Salesforce Role Hierarchy Creation Best Practice
Creating the Role Hierarchy:
To create role hierarchy we have to follow the following process.
Go to sales force homepage https://ap5.salesforce.com/home/home.jsp.
1. We will find setup bar on the right side of the homepage.

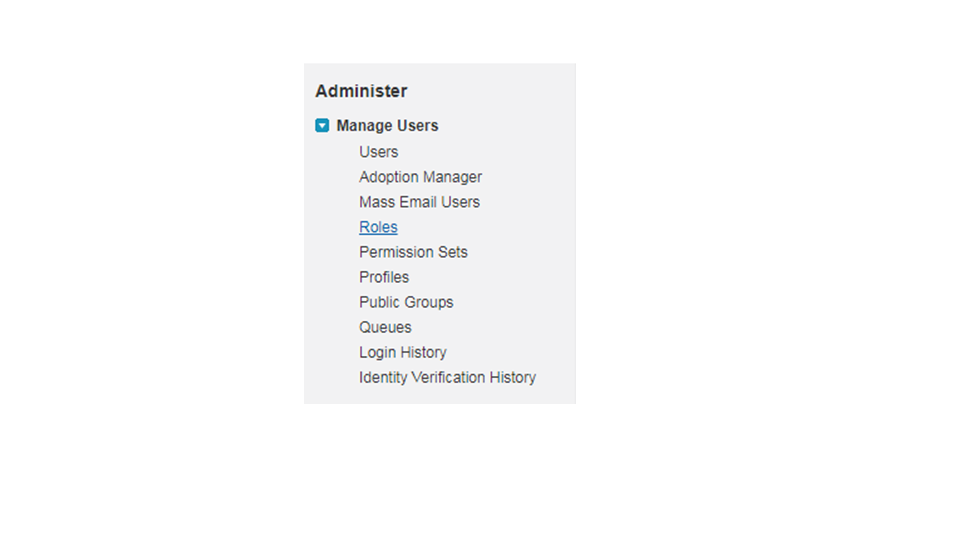
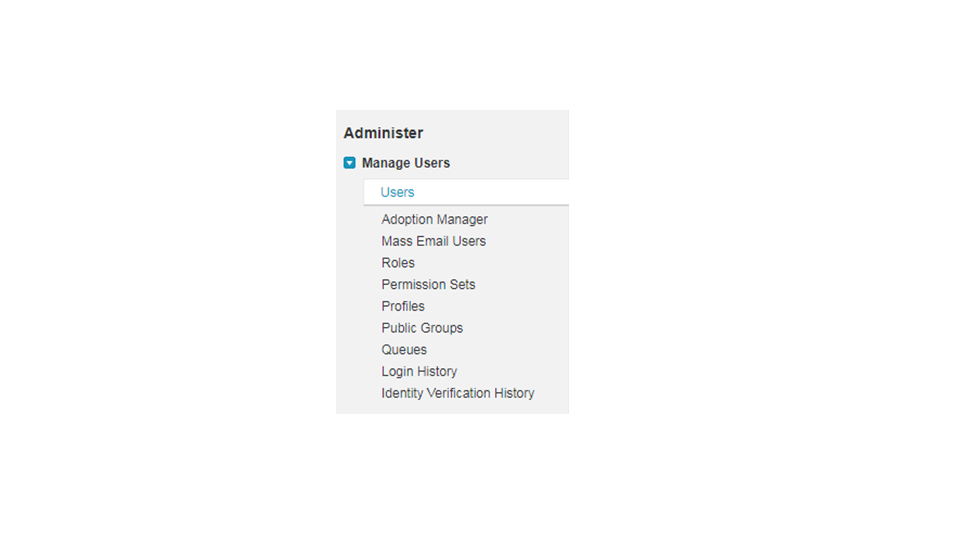
2. Go to administrator and select Manage users and then click on Role.
3. Now we are taken to a new window to select Sample Role Hierarchy from List.
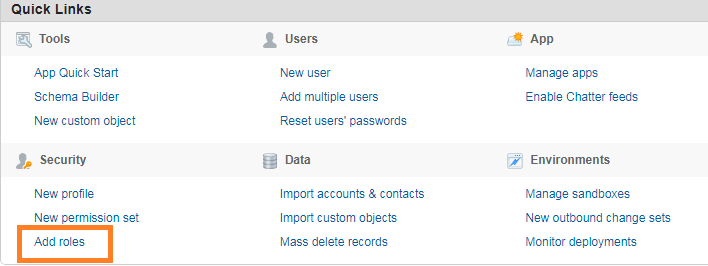
4. Go to set up roles and select add roles to add new roles to the hierarchy.
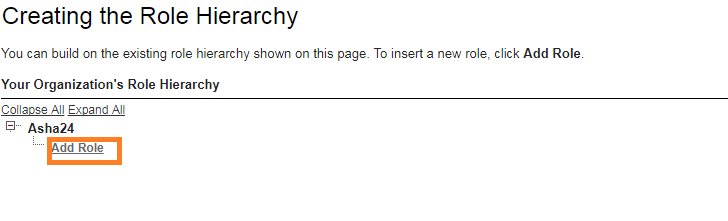
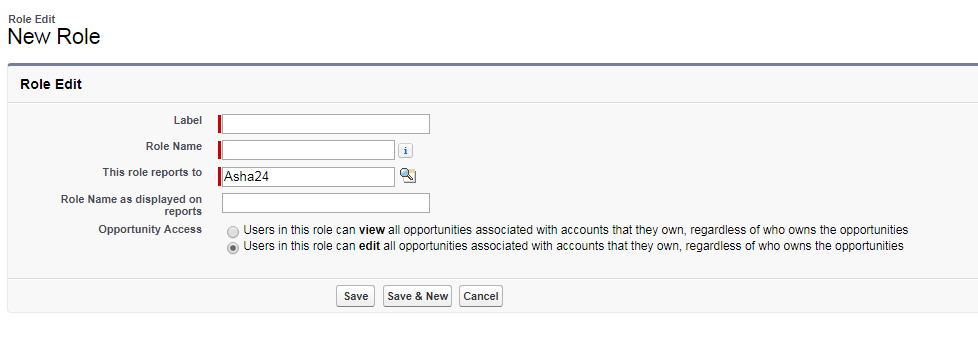
5. If we select Add role the below is displayed and again click on add role to create a new role.
6. To create a new role give the label, role name and select role report to the field. Select save button to create a new role.
7. The name which we are giving at role report that will act as manager to the new role in salesforce.
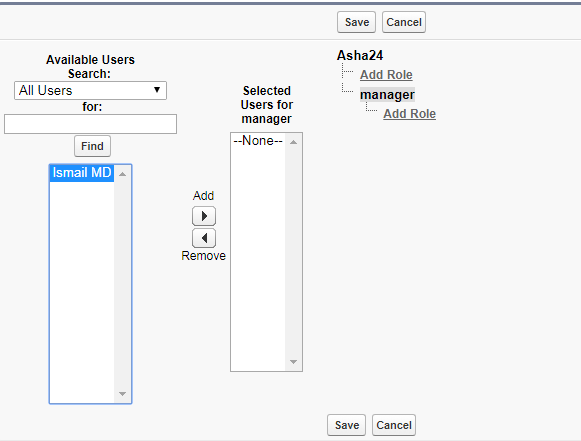
8. We have to assign users to the role which we have created. The users will only access the data which we assigned to this role.

9. Select all users from the list, and then all users that are available in our account will be displayed. Add users to Selected Users from available users block.
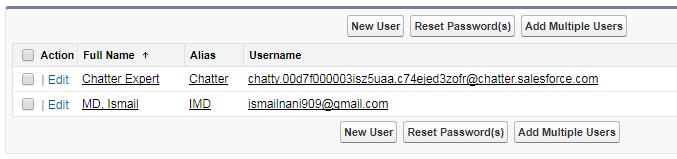
10. To check whether this role is assigned to user manager, go to the administrator, and manage users click on users from that.
11. From the below, we can know that the user can be named as manager.
The Role we have created can be viewed in different modes as below mentioned.
• Show in Tree View.
• Show in Sorted List View.
• Show in List View.
Sharing Records with a Role Functionality:
Implementing role functionality in the sales force is easy. It’s best to start with our company’s organization chart and then considering different job titles into single roles wherever possible.
Role functionality doesn’t need to match organization chart exactly. Alternately, every role in the hierarchy must represent a level of data access that a user or group of user’s demands.
Users can be allocated to one profile, one role, and as several permission sets as the organization’s edition allow. Certain work collectively to determine the data a user can view and edit.
The profile manages a user’s object and field level permissions, adding the apps and tabs that occur when the user logs in. All user demands to be allowed to a profile.

The role impacts a user’s knowledge to view and edit single object records over the role and sharing rules. A user mustn’t be allocated a role to utilize Salesforce.
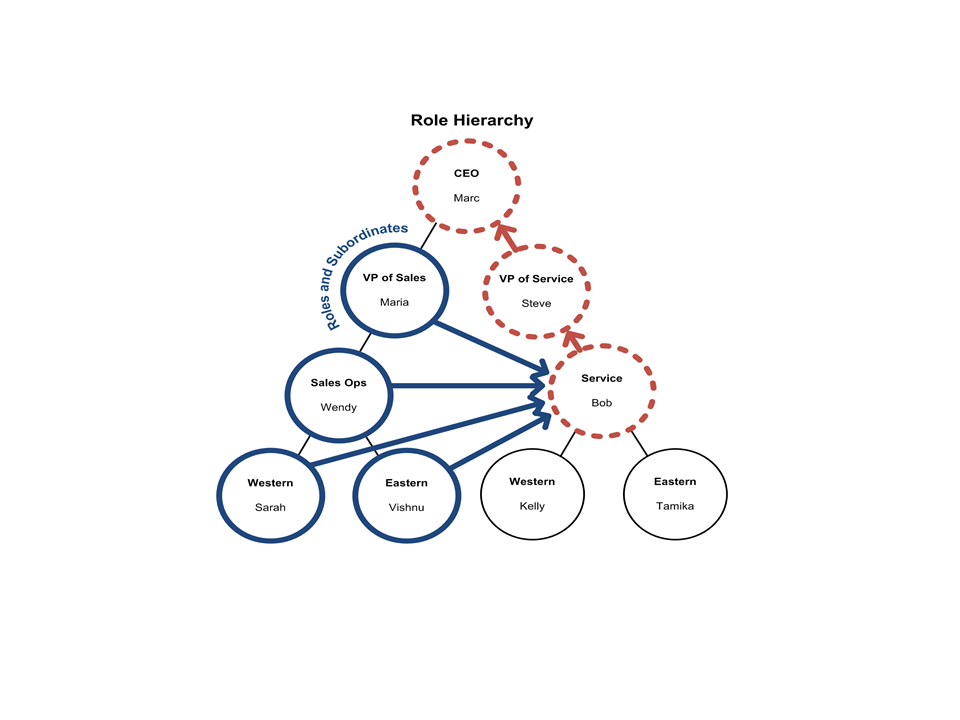
• Roles—to give access to the members of a role in the role functionality.
• Roles and Subordinates—to give access to the members of a role along with their subordinates.
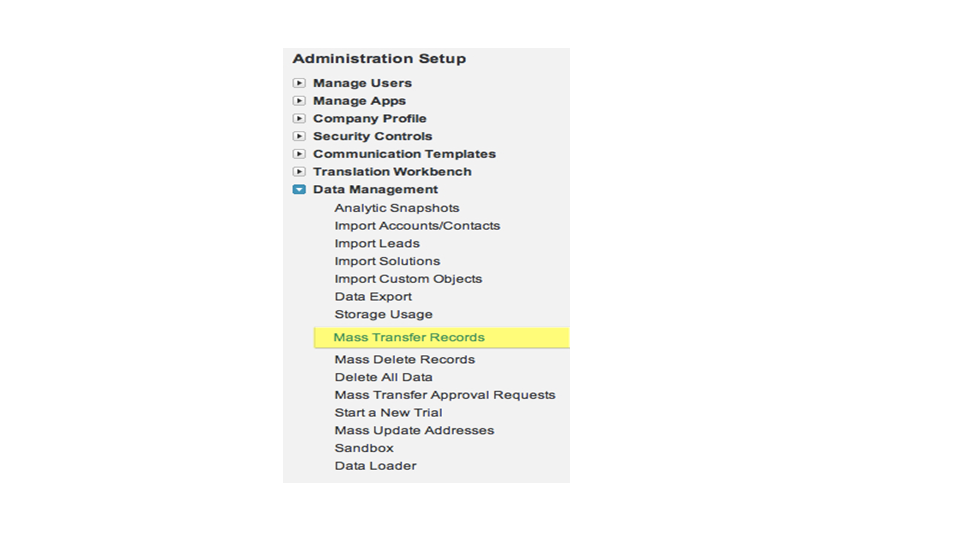
Role transfer & mass Transfer functionality
Mass Transfer is used to transfer records from one user to another. We can transfer records for accounts, leads, service contracts and custom objects.
Permission is required while transferring records from user to user. I think that this scenario probably comes up fairly often.
With mass transfer, the following transfers can be done,
• To transfer Accounts and service contracts.
• To transfer custom objects.
• To mass transfer leads.
We have to follow the same process to transfer any lead, object accounts and etc. As one is explained below:
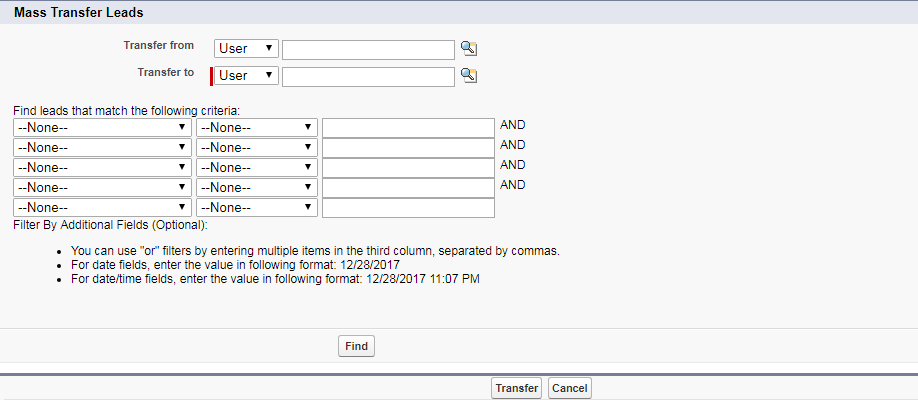
To mass transfer leads:
While transferring leads go to tab bar and click on leads. Select mass transfer then edit and give source and destination address and click on transfer.
Points to learn during Transferring Records:
• The transferring a record we have to give the accurate Profile permissions (Edit and Transfer) to such object.
• And think about company’s security. If you have an organization, we could probably be influencing record access for users.
• Contact records are transferred simultaneously among Account record ownership automatically.
• Attachments and Open Activities are also automatically reassigned with a record transfer in share.

Chandanakatta
Author
Hey there! I shoot some hoops when I’m not drowned in the books, sitting by the side of brooks.