Create Microsoft Azure Container Services
Azure Container Service (AKS) performs it easy to create, configure, and manage a cluster of virtual machines that do preconfigure to run containerized applications
On utilizing AKS you can get the advantage of the enterprise-grade characteristic of Azure, while although operating application portability over Kubernetes and the Docker image format.
ACS (Azure Container Service) supports 3 Orchestrators:
1. Kubernetes.
2. DC/OS among Marathon, and
3. Docker Swarm.
Kubernetes:
Kubernetes is an open-source system for automating deployment, scaling, and management like containerized applications.
DC/OS (Datacenter Operating System):
DC/OS is a split of the operating system from on the Apache Mesos distributed systems kernel. It allows the administrators of various machines as if they operated an individual computer.
Docker Swarm:
Docker Swarm is a clustering and scheduling tool for concerning Docker containers. By Swarm, IT administrators and developers can establish and maintain a cluster of Docker nodes as an individual virtual system.
Comparisons between ACS and AKS:
ACS is current Azure Container Service, which is the uncontrolled version compared to the controlled version of Azure Container Service (AKS).
Managed Kubernetes in Azure:
AKS decreases the complexity moreover operational overhead of maintaining a Kubernetes cluster by relieving significant about that stability of Azure. Essentially a hosted Kubernetes service, Azure manages crucial tasks like health monitoring and support for you. In addition, you pay just for the agent nodes within your clusters, not for the masters.
The controlled Kubernetes service, AKS gives:
• Self-healing hosted control plane (masters).
• Easy cluster scaling.
• Cost savings – pay only for running agent pool nodes.
• Automated Kubernetes version upgrades and patching.
Creating Docker cluster with ACS:
1. Login to Azure Microsoft Azure.
2. Select Azure Active Directory > App registrations > New application registration.
3. Enter a name for the application, this can be any value. Select “Web app / API” for the application type. Enter a value for the Sign-on URL; this can be any value in a valid URL format but does not need to be a real endpoint.
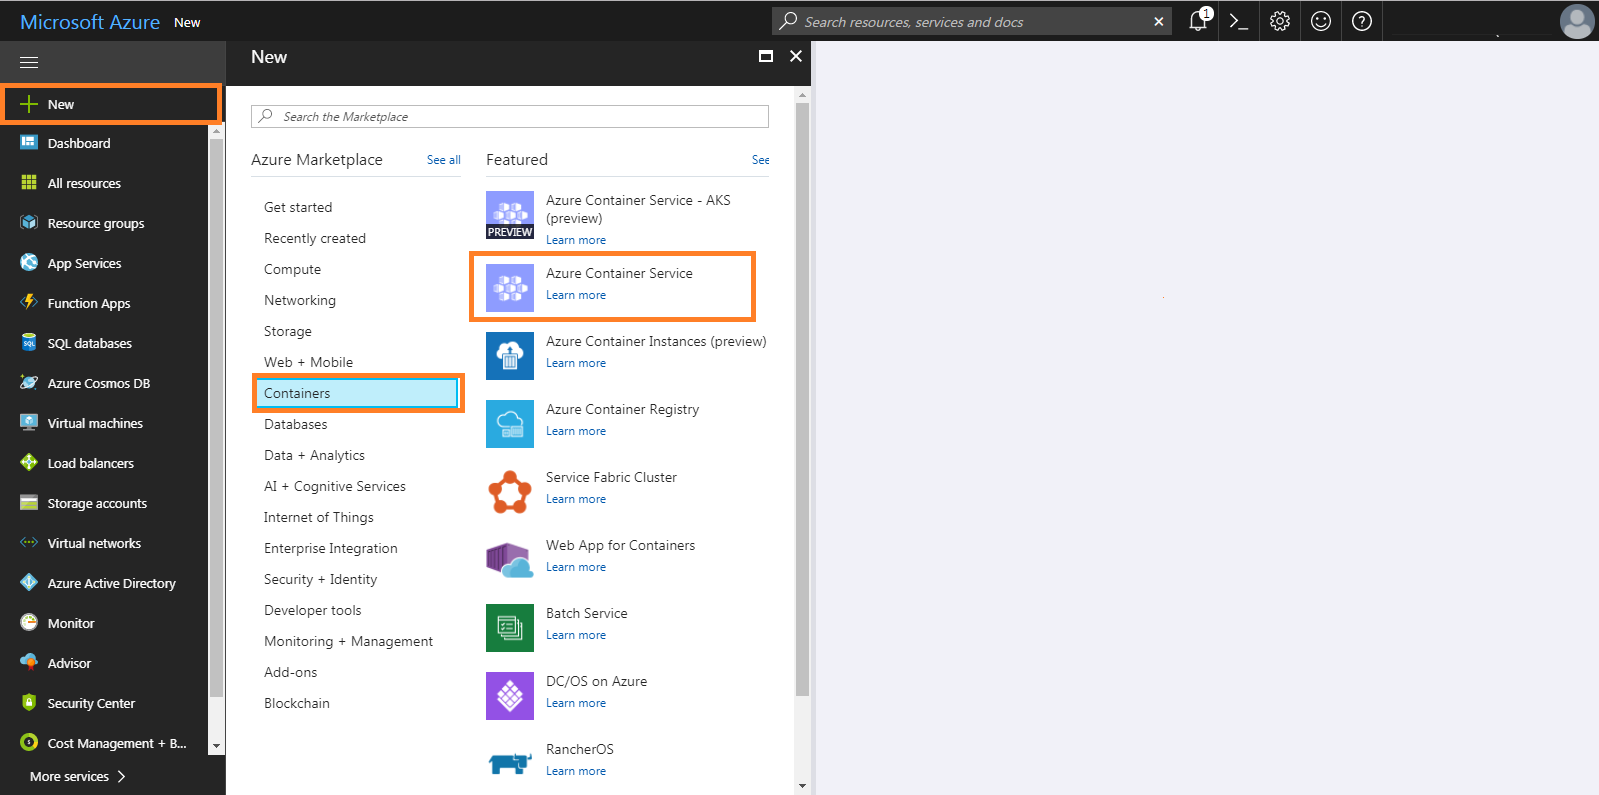
4. Create a container service:
In the Azure portal, here you can see that Microsoft Azure “Dashboard”. On the left-hand side, you can see the navigation bar. Click on “NEW”. Select the “Container”. Go to the Azure container services.
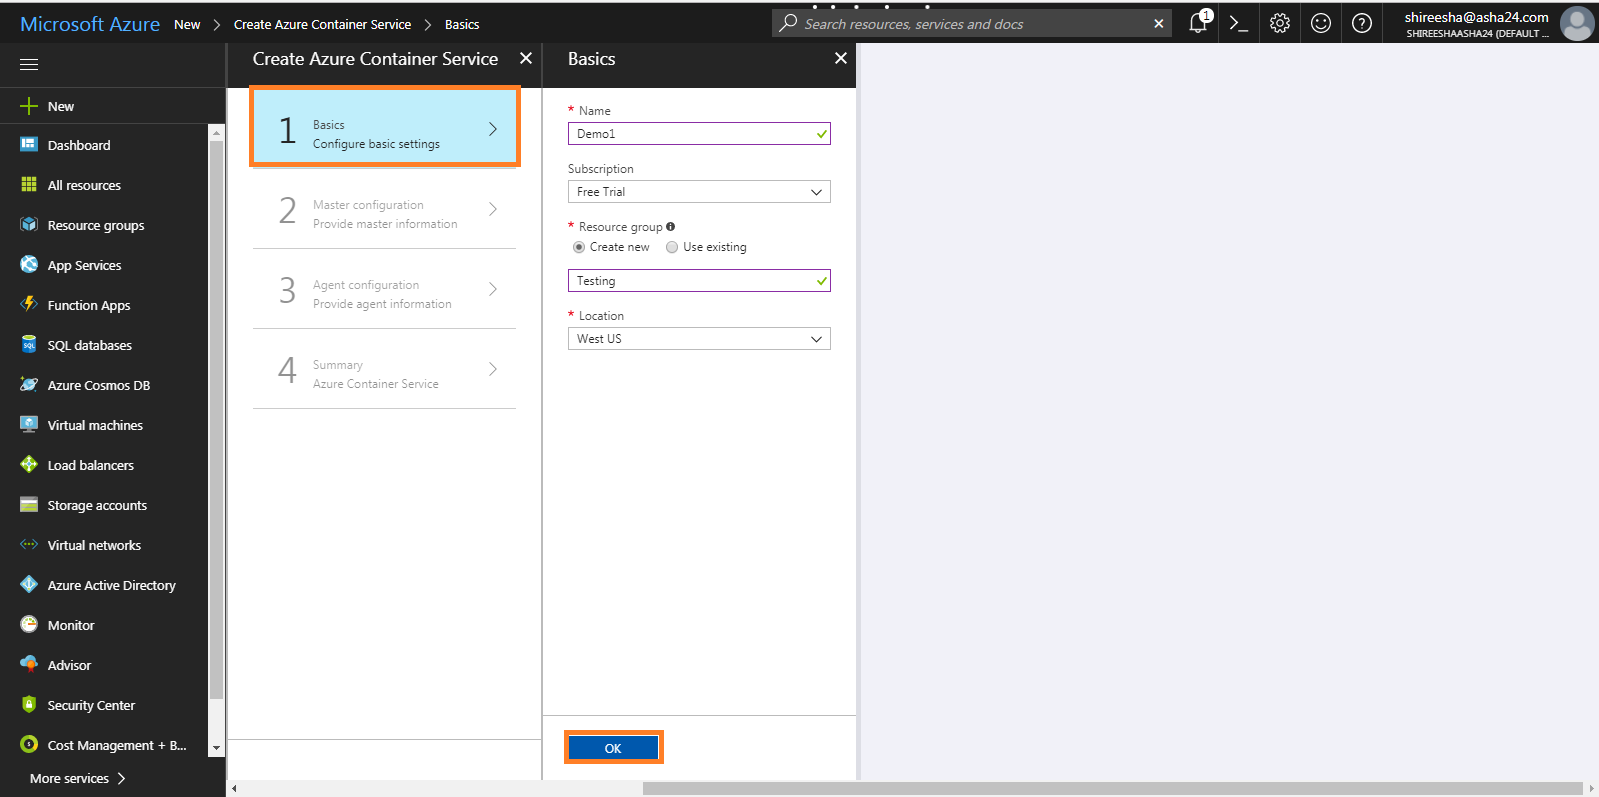
5. Basic Settings:
Add a new container service and provide the basic settings. Choose your subscription and, create a new resource group.
You can also change location, but make sure that ACS is available in the region of your choice.
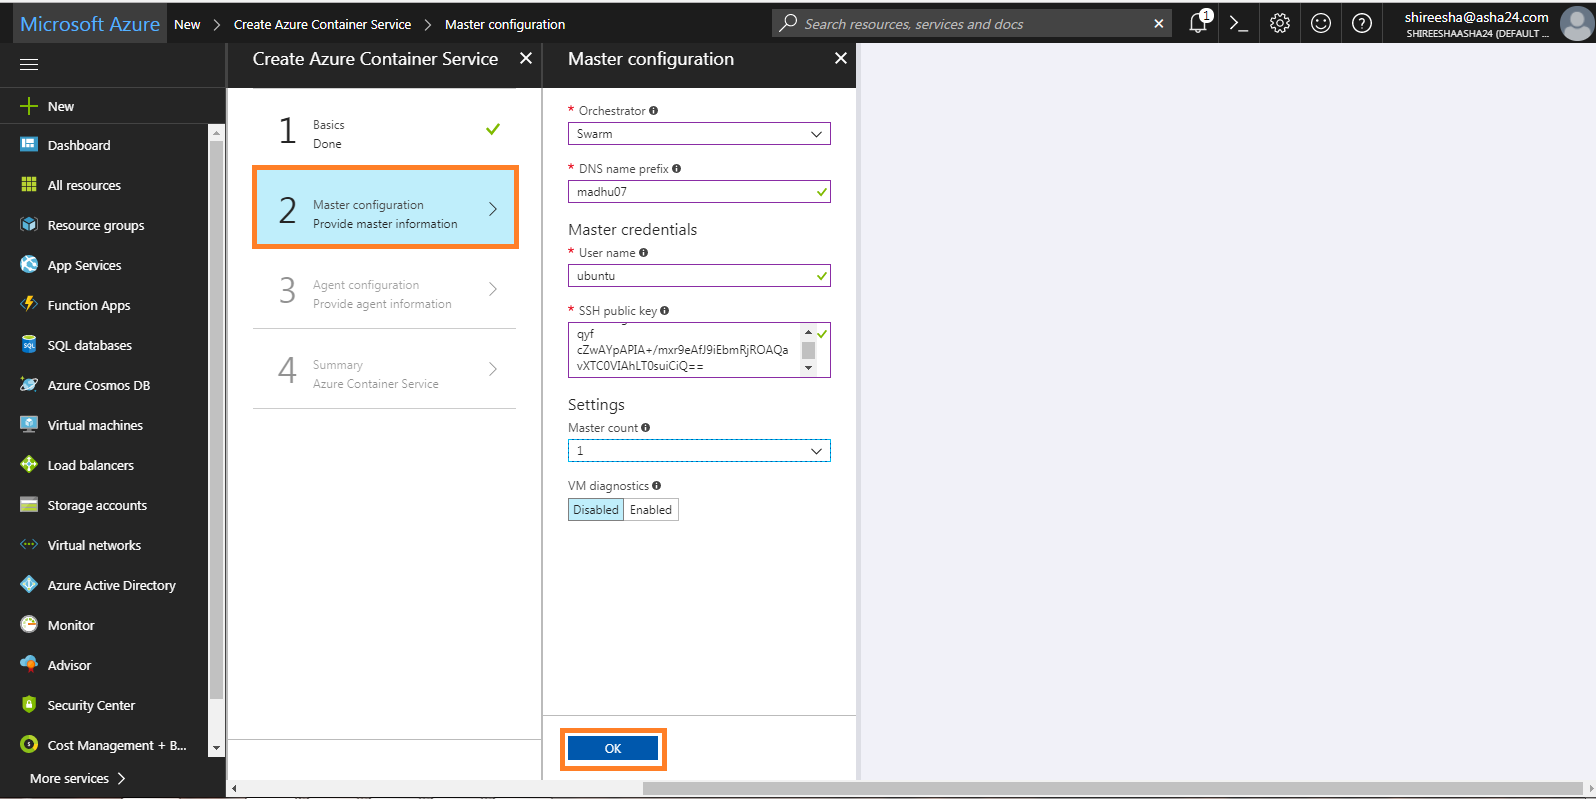
6. Master Configuration:
To master configuration, take a DNS name, provide master credentials of username, public key, and the master count i.e. the no: of masters to the cluster. Choose Swarm for Orchestrator.
7. Agent Configuration:
Chose the agent count and select the machine size for Agent instance.
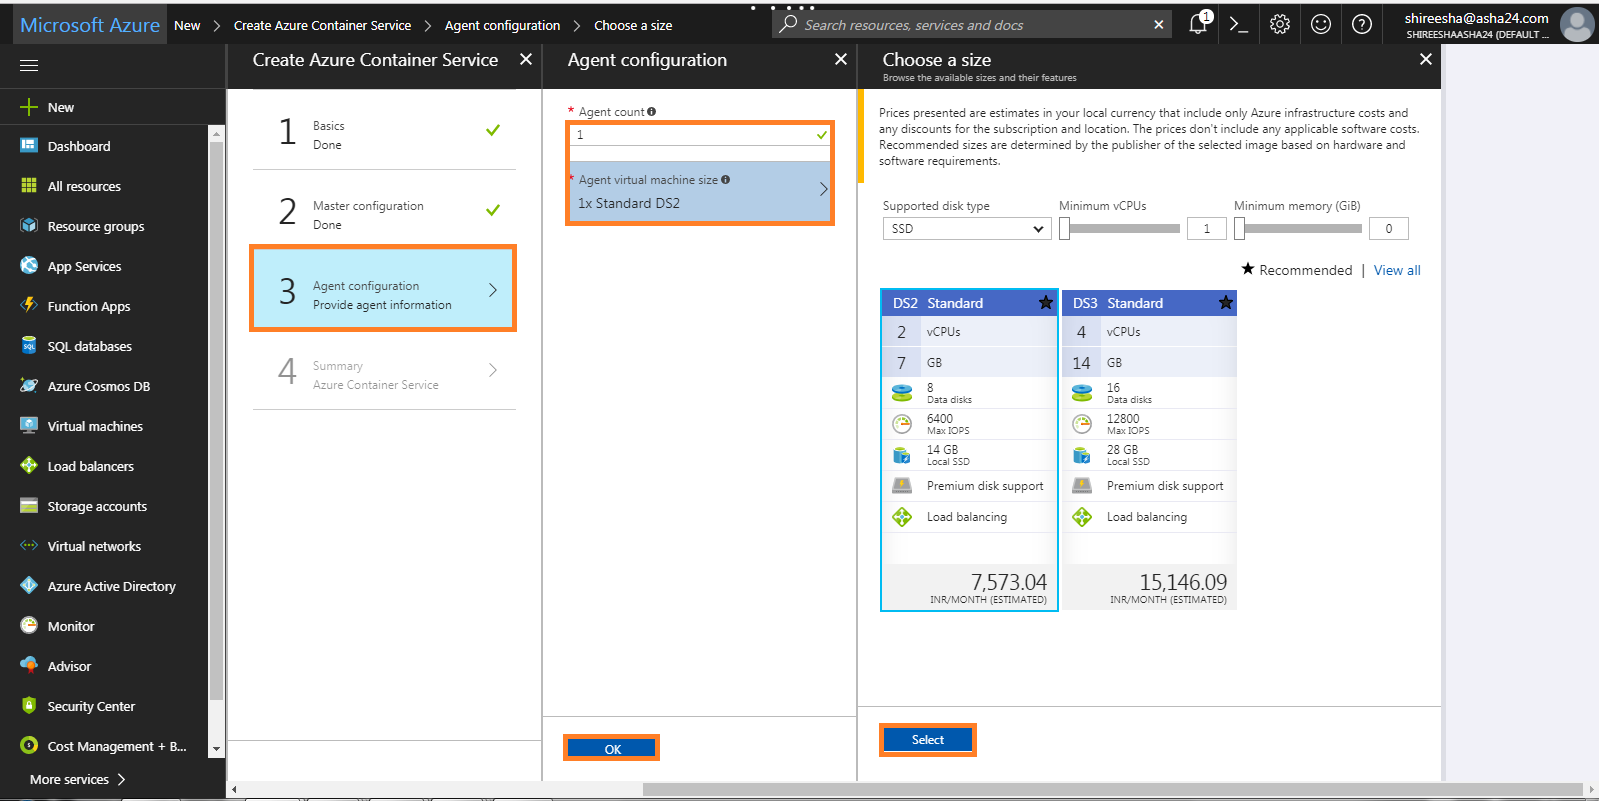
You can analyze the settings before launching this container service.
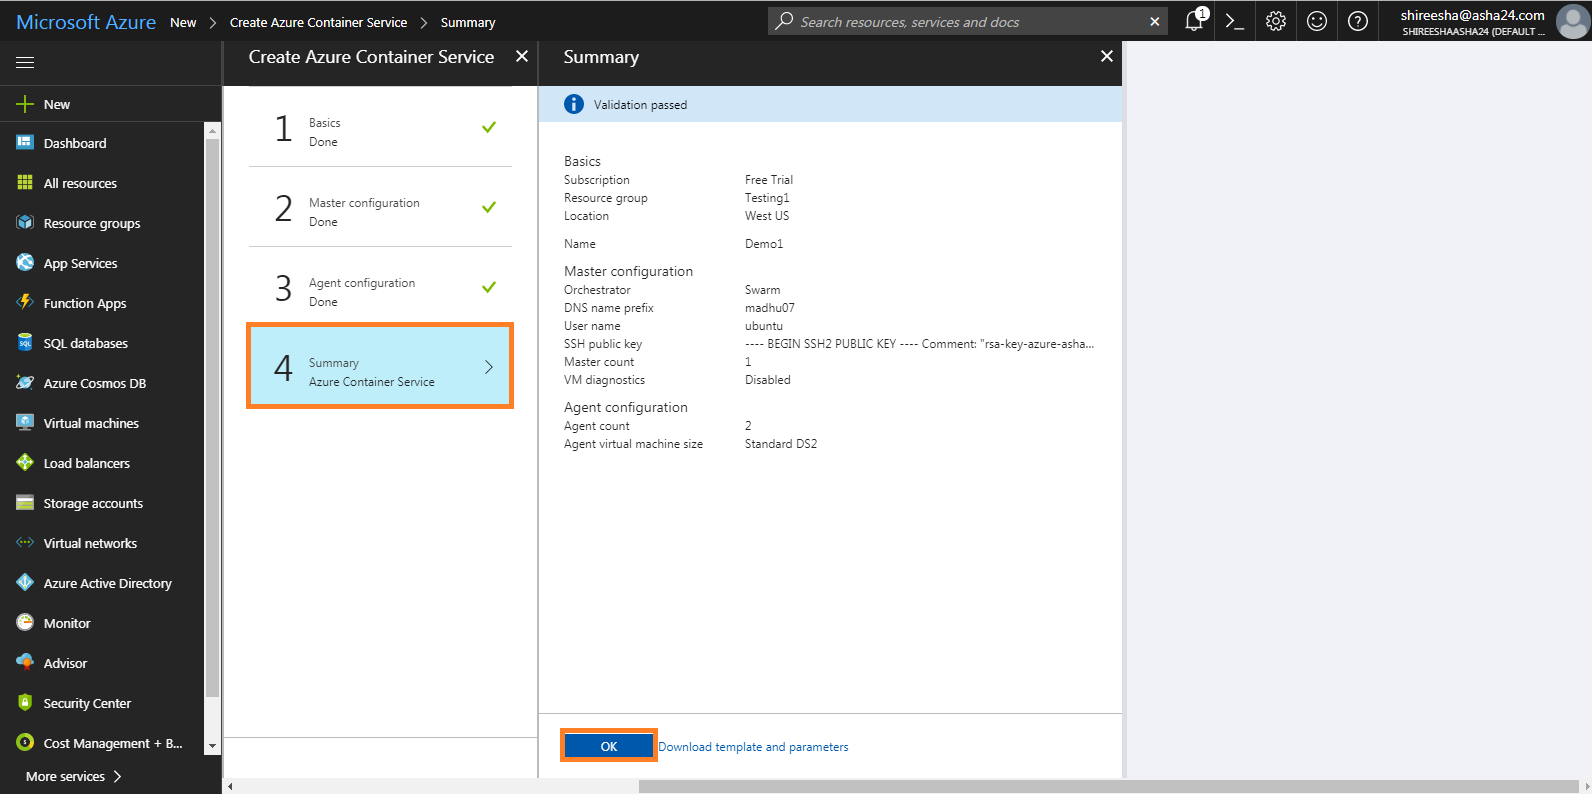
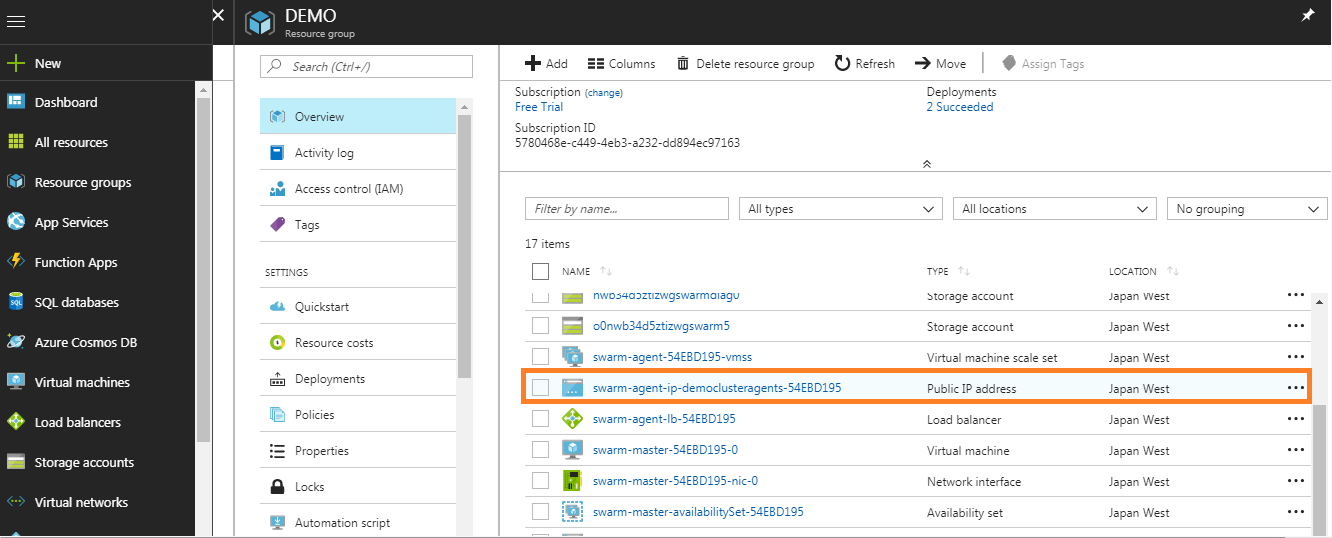
Resource group built by this container service will have multiple items such as the master, agent, storage accounts, load balancer, public IP addresses, virtual network, and virtual interfaces.
These resources generated by the container service, we are interested in the container service “container service-Demo″. Click on it to see the overview of service. Note down the master FQDN (fully qualified domain name), which will be used to connect to the container service.
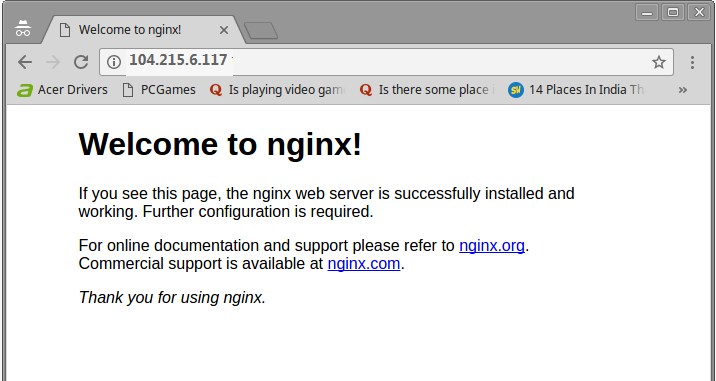
8. Test Application:
Now, currently that our container is running, we require the endpoint to our application (Nginx). In the Azure, select the agent load balancer
Note down the public IP address for this load balancer
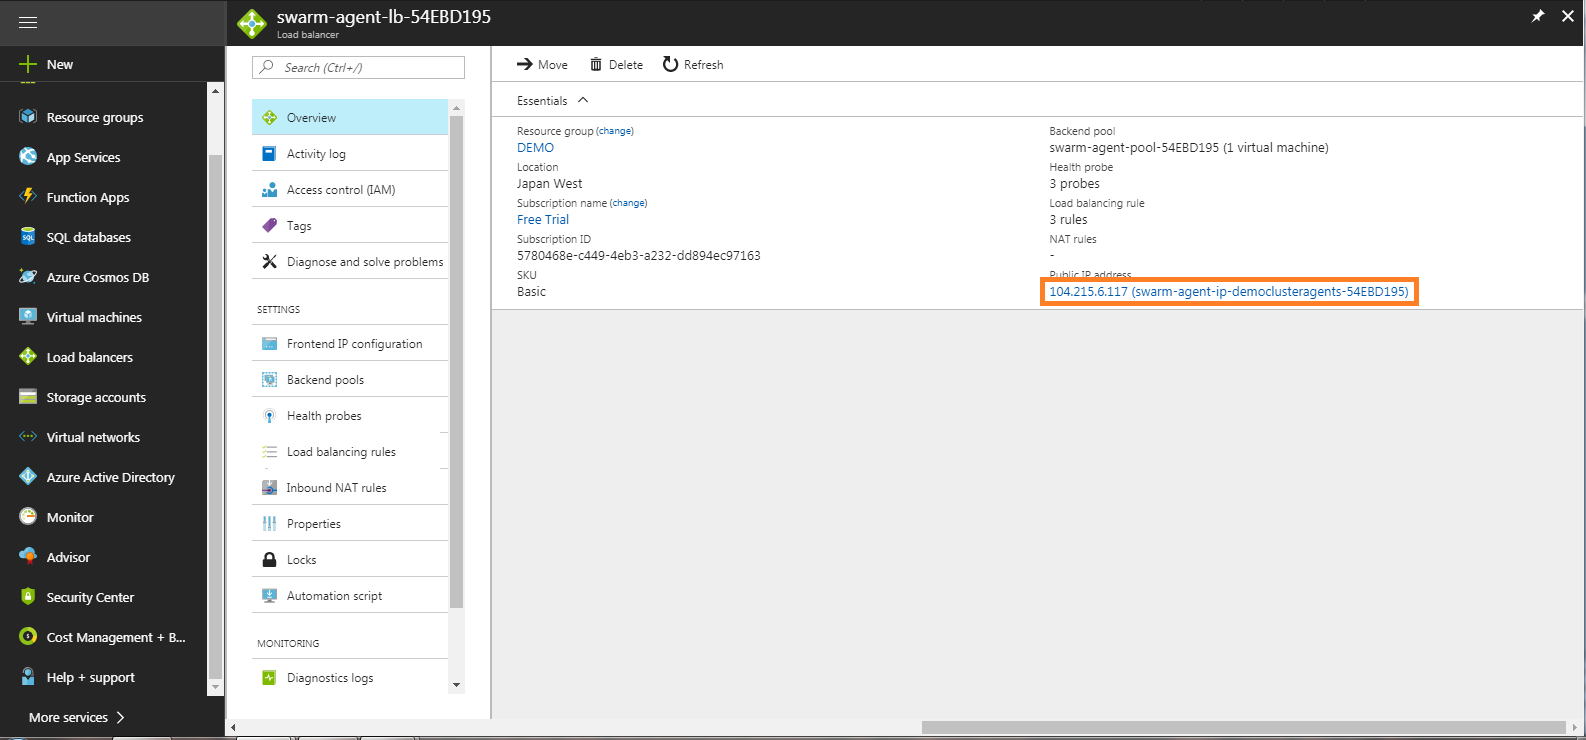
The load balancer developed by ACS already consists of three rules corresponding to port 80, 443 and 8080. In case you have deployed an application which utilizes any other port, you must want to add the required rule manually.
Immediately hit the IP address, and you will get Nginx application operating on the ACS cluster.
These are above steps to serve in Microsoft Azure container service to deploy your stack.
If you like this article, and wish to know more on Microsoft Azure, click here and read up.

Chandanakatta
Author
Hey there! I shoot some hoops when I’m not drowned in the books, sitting by the side of brooks.