Windows Azure Pack Step By Step – Installation Guide
Microsoft Azure Pack for Windows Server:
Microsoft Azure provides huge amounts of infrastructure that we can utilize to run applications and systems, with the ability to run a huge amount of workloads.
And, you can always scale up or out accordingly.
We can set up an environment that closely resembles our production environment, and it won’t even cost a small fortune because we only pay for the resources and time that we use!
One of the ways the cloud really stands out is in its scalability. Sometimes, the usage of our apps and services spike or drop off, at other times the usage may be completely unpredictable.
In both cases, Azure can scale out and go up to meet demand, or scale back in and go down when the load decreases.
This scalability enables our applications and technology to grow as fast as our business.
And, if we want to turn our systems off for a period of time, we won’t have any new deliverables to test and won’t be spending money on wasted and underutilized resources.
How to install azure pack for Windows Server:-
Requirements are as follows:
Hardware Requirements
RAM: 8 GB (do not use dynamic memory)
HDD Space: 40 GB
Software Requirements:
Windows Server 2012
Microsoft Web Platform Installer 4.6
Microsoft .NET Framework 3.5 Service Pack (SP) 1
Internet Information Services (IIS) 8 (built-in component of Windows Server 2012) or IIS 8.5 (built-in component of Windows Server 2012 R2)
.NET Framework 4.5 Extended with ASP.NET for Windows 8
Step 1: Install Windows Server:
1) Download and install Windows Server 2012 R2.
2) Launch the Server Manager.
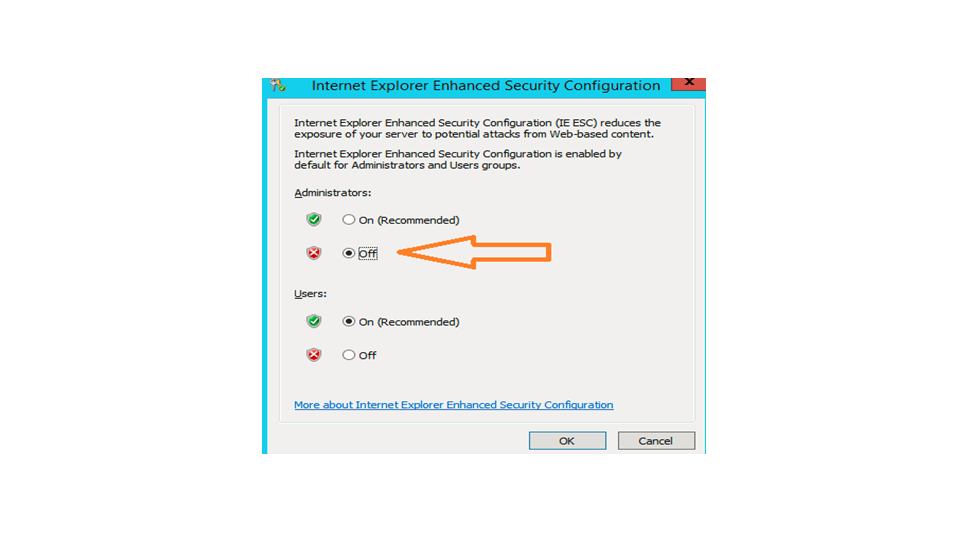
3) In the Server Manager dialog, go to Local Server Properties, click on the IE Enhanced Security Configuration link.
4) Internet Explorer Enhanced Security Configuration dialog box, change the setting for Administrators from “On” to “Off“, then click OK.
Step 2: Install Web Server IIS Role:
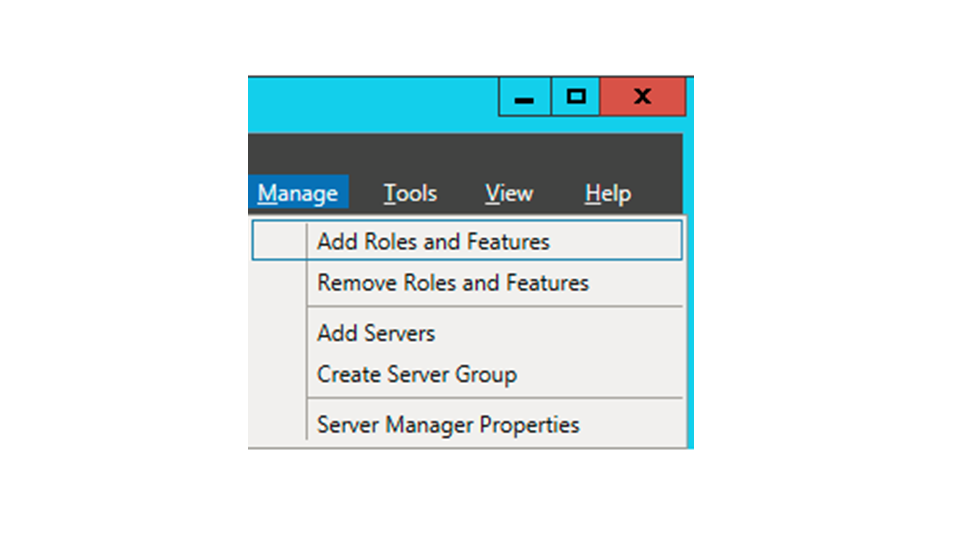
1) In Server Manager dialog box, click on Manage –> Add Roles and Features.
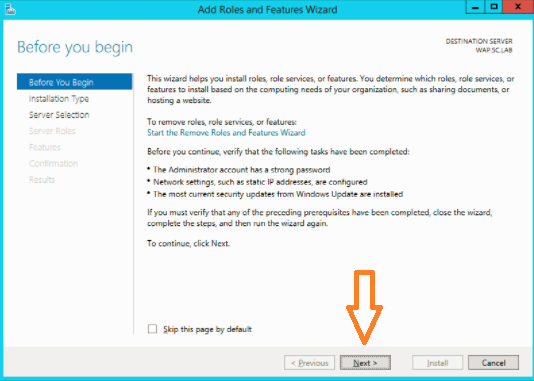
2) On Add Roles and Features Wizard screen, click on Next.
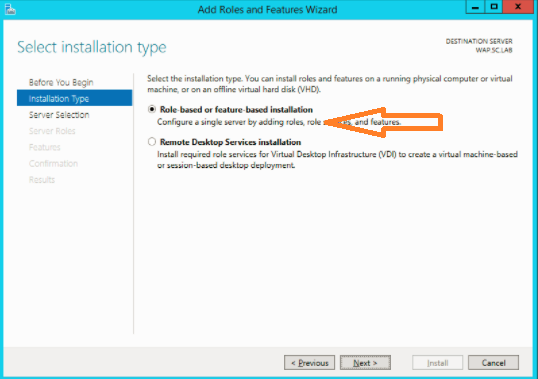
3) On Installation Type screen, make sure that the “Role-based or feature-based installation” is selected, then click on Next.
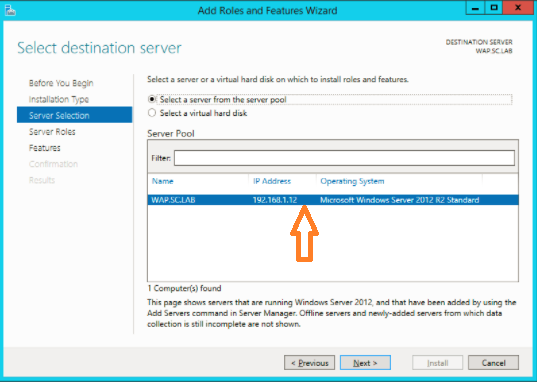
4) On Server Selection screen, ensure the correct server is selected, then click on Next.
5) On Server Roles screen, select Web Server (IIS).
6) For web server to add additional required features, click Add Features on the Add Features That are required for Web Server (IIS) dialog, then click on Next.

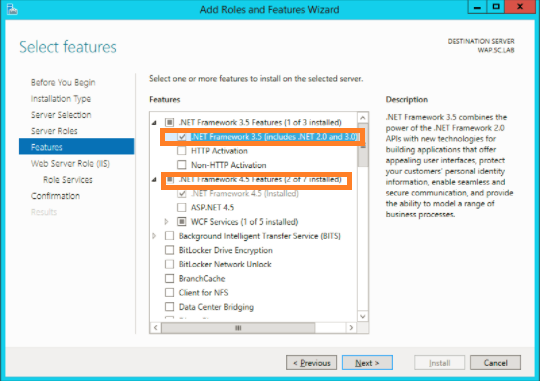
7) On Features screen, make sure that “.NET Framework 3.5“, and “ASP.NET 4.5” is selected, then click on Next.
8) On Web Server Role (IIS) screen, read the information presented, then click on Next.
9) On Role Services section, make sure that the following is selected, then click on Next.
10) Next, we will get Conformation tab and select Install.
11) Next, on Result Screen click on Close.
Step 3: Installing the Microsoft Web Platform Installer:
1) First, you have to Download the latest version of the Microsoft Web Platform.
2) Start the installation of the web platform.
3) Read the License Agreement and Accept it, click on Install.
4) Once the installation complete, select Finish.
Step 4: Installing the Portal and API Express option:
1) Click Start button to start the Web Platform Installer.
2) Write Azure Pack in the search box. Click Add next to Azure Pack: Portal and API Express, and then click on Install.
3) Accept all terms and conditions on Prerequisites page.
4) The installation begins. Your machine might restart during the installation process.
5) After installation, ensure that all Internet Explorer windows are closed, and then click Continue to start the Service Management Configuration site.
6) In case Internet Explorer security certificate warning page is displayed, click on Continue to this website.
7) On the Database Server Setup page, enter the name of the database server or instance of Microsoft SQL Server.
8) Choose the mode of authentication that you want to use, SQL Server Authentication or Windows Authentication. Reference in which mode to use.
9) Enter a passphrase that is to be used to encrypt and to decrypt data in the Configuration Store.
Enter the passphrase again to confirm it, and then click on the next arrow.
10) On the Customer Experience Improvement Program, choose if you wish to participate in the program or not.
11) The features that are to be installed are listed on the Features Setup page.
12) After the features are successfully configured, click on the check mark in the bottom right corner of the Features Setup.
13) To go to the management portal for tenants, open an internet browser and go to https://localhost:20921/#Workspaces/All/dashboard .
14) The management portal for tenants allows tenants to subscribe to plans and add-ons, upload certificates, manage their accounts, and more.
15) Once complete installation of the components of Azure Pack Expression. The second process is adding services like Web sites, Virtual Machines and Databases (SQL and MySQL) .

Mahesh J
Author
Hello all! I’m a nature’s child, who loves the wild, bringing technical knowledge to you restyled.