Guide to Azure VM Monitoring Tools
Microsoft Azure:
Windows Azure later renamed Microsoft Azure is a cloud-computing platform, designed by Microsoft to successfully build, deploy, and manage applications and services through a global network of data centers.

Cloud computing can be referred to as the storing and accessing of data over the internet rather than your computer’s hard drive.
This means that data is stored in a remote place and is synchronized with other web information. So you do not access the data from either your computer’s hard drive or over a computer network.
Models of cloud computing
Software as a Service (SaaS):
With SaaS model, you consume as a service only the Applications that you need for your industry. These applications run on the provider’s cloud infrastructure, making them accessible from various devices like browser or mobile.
Platform as a Service (PaaS):
With PaaS model, you get a core hosting operating system and optional building block services that allow you to run your own applications or third-party applications.
You need not be concerned about lower level elements of Infrastructure, Network Topology, Security and Load Balancers, the Cloud Service Provider does it for you.
The Provider gives you a fully functional operating system (OS) with major platform software.
Infrastructure as a Service (IaaS):
With IaaS model, you can outsource the components of infrastructure like Virtualization, Storage, Networking, and Load Balancers and so on, to a Cloud Provider like Microsoft.
To deploy your applications to the Cloud, you have to install Operating System (OS) images and related application software on the cloud infrastructure. You are responsible to patch/update/maintain the Operating System (OS) and any application software you install.
The Cloud provider will typically bill you on computing power by the hour and the number of resources allocated and consumed (as per its service level agreement (SLA)).
Benefits of Cloud
a) Cloud service offers scalability so that allocation and de-allocation of resources are dynamical as per demand.
b) It saves you money by reducing capital infrastructure.
c) It allows you to access the application independent of its location and hardware configuration.
d) It simplifies the network and lets you access the application without buying a license for the individual machine.
e) Storing data on clouds is more reliable as it is not lost easily.
Virtual Network (VNet):
VNets are used in Azure to provide private connectivity for Azure Virtual Machines (Azure VMs) and some Azure services.
VMs and services that are part of the same virtual network can access one another. By default, services outside the virtual network cannot connect to services within the virtual network.
However, you can configure the network to allow access to the external service.
A Virtual Network Gateway is a fully managed service in Azure that is used for cross-premises connectivity.
You can add a Virtual Network Gateway to a virtual network and use it to connect your on-premises network to Azure, effectively making the virtual network in Azure an extension of your on-premises network. This provides the ability to deploy hybrid cloud applications that securely connect to your on-premises datacenter.
When creating a virtual network, there are a few things you need to know, such as the address space, subnets, and DNS servers that you want to use.
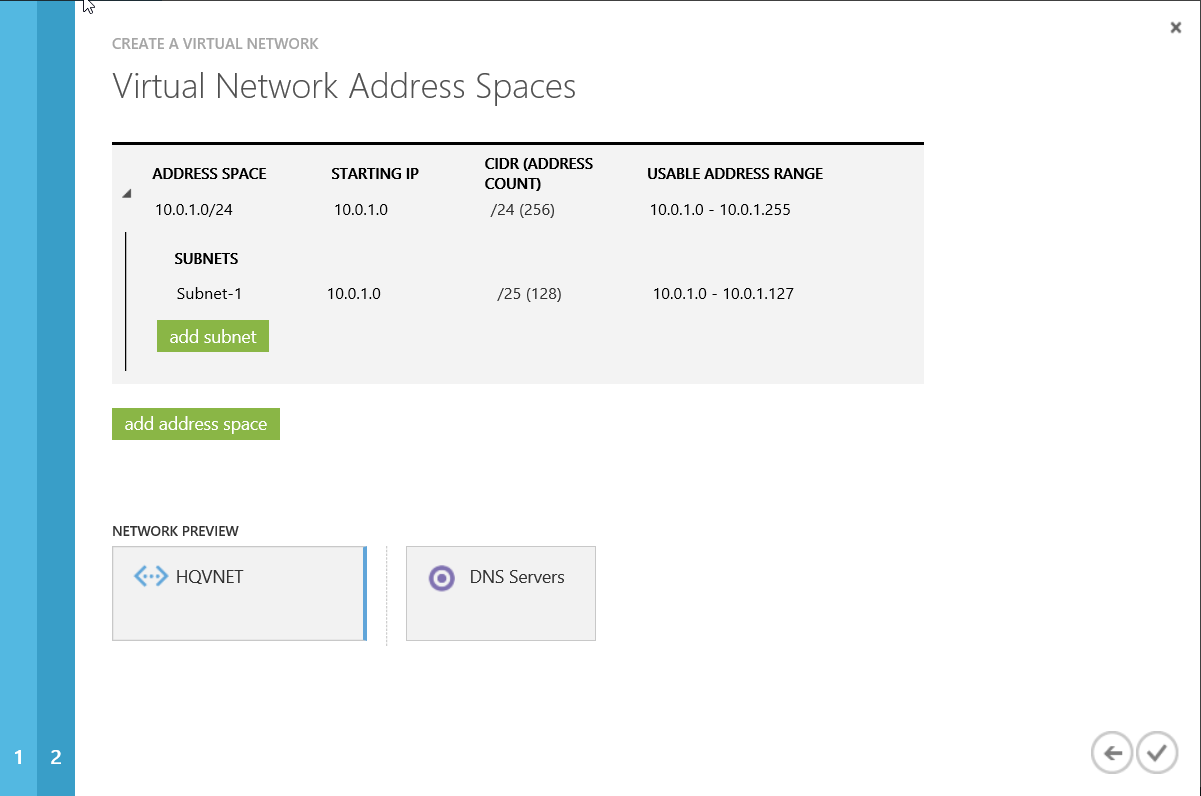
Virtual network address spaces:
When you set up a virtual network, you specify the topology of the virtual network, including the available address spaces and subnets. If the virtual network is to be connected to other virtual networks, you must select address ranges that are not overlapping.
This is the range of addresses that the VMs and services in your network can use. These will be private and cannot be accessed from the public Internet.
This used to be true only for the such as 10.0.0.0/8, 172.16.0.0/12, or 192.168.0.0/16, but now Azure will treat any address range including unrouteable IP addresses as part of the private VNet IP address space that is only reachable within the VNet, within interconnected VNets, and from your on-premises place.
Subnets:
After specifying your virtual network (VN) address space, you can create one or more subnets for your virtual network (VN). This is to break up your network into more manageable sections. For example, you might assign 10.1.0.0 to VMs, 10.2.0.0 to back-end services, and 10.3.0.0 to SQL Server Virtual Machines (VMs).
Note: Azure reserves the first four addresses and the last address in each subnet for its own use.
By default, there is no security boundary between subnets, so services in each of these subnets can talk to one another. However, you can now set up Network Security Groups (NSGs), which allow you to control the traffic flow to and from subnets and to and from Virtual Machines(VMs).
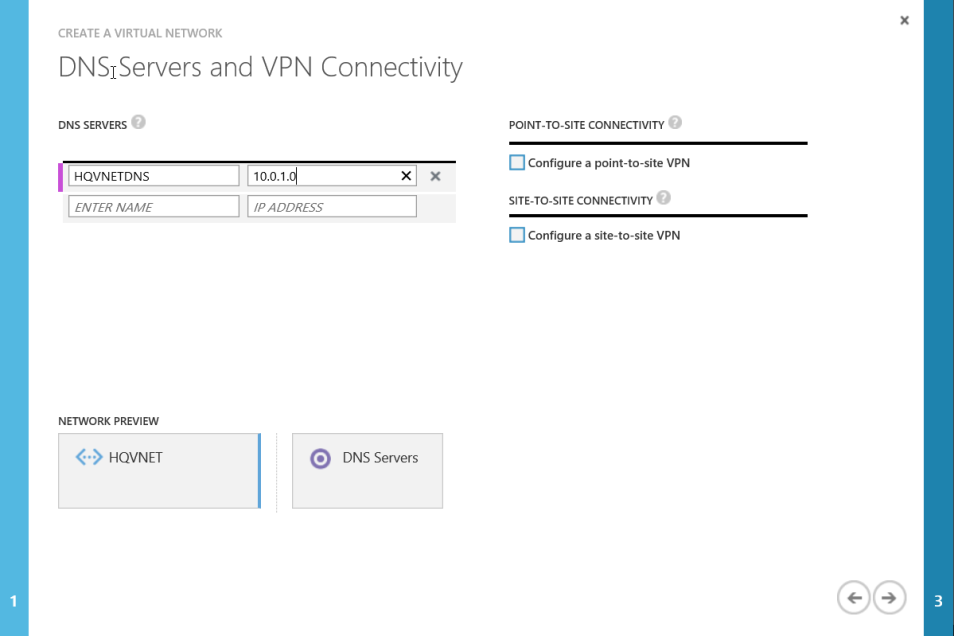
DNS servers:
If you want to refer to your VMs by hostname or fully qualified domain name (FQDN) directly, rather than using an IP address and port number, you need a DNS service to provide name resolution. It is helpful to figure this out before deploying VMs or role instances.
You can change it later, but if you do you will have to reboot all of the VMs in the virtual network because the DNS server information is injected into the settings at startup.
Creating a virtual network:
To put VMs into a virtual network, you create the virtual network and then as you create each VM, you assign it to the virtual network and subnet. VMs acquire their network settings during deployment or startup.
VMs are assigned an IP address when they are deployed. If you deploy multiple VMs into a virtual network or subnet, they are assigned IP addresses as they boot up.
If you create a VM and later want to migrate it into a virtual network, it is not a simple configuration change. You have to redeploy the VM into the virtual network. The easiest way to do this is to delete the VM, but not with any disks attached to it, and then re-create the VM using the original disks in the virtual network.
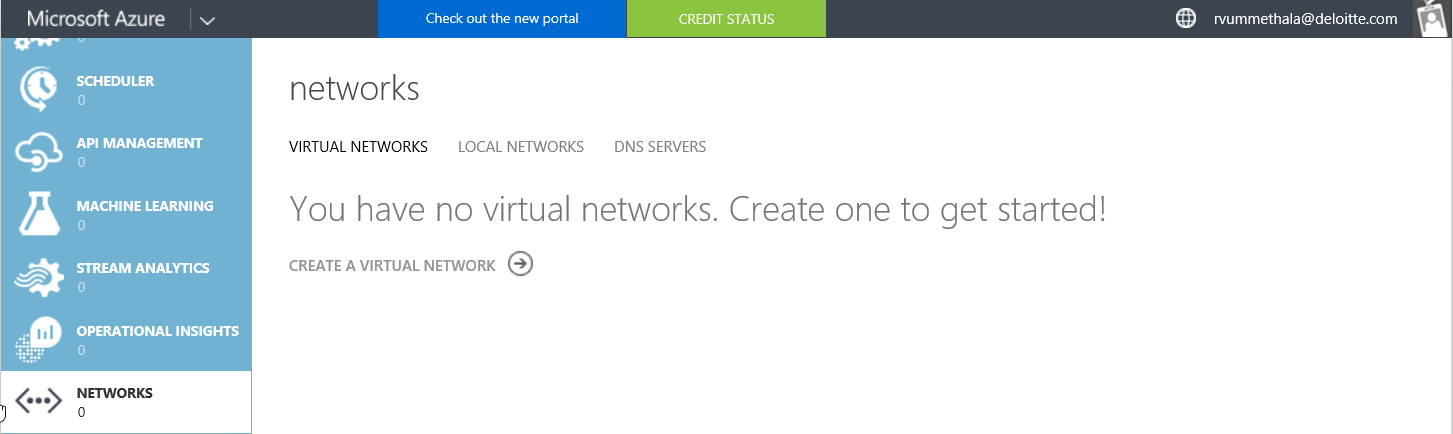
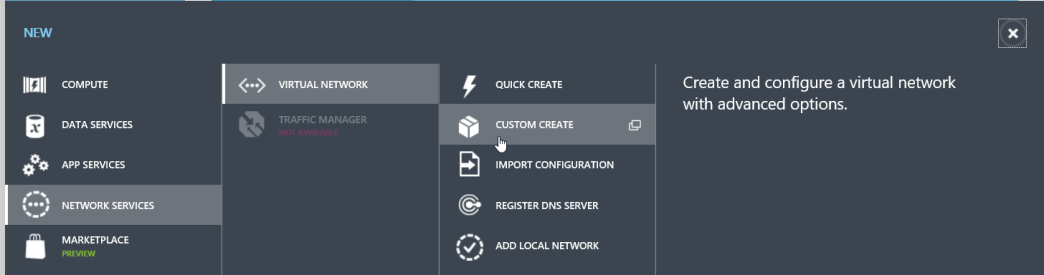
1) Log into the site. Click Networks ->Create a Virtual Network.
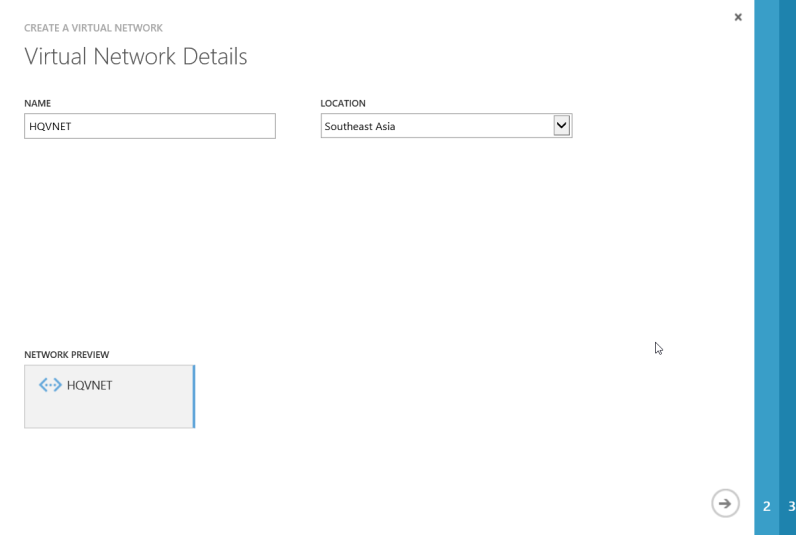
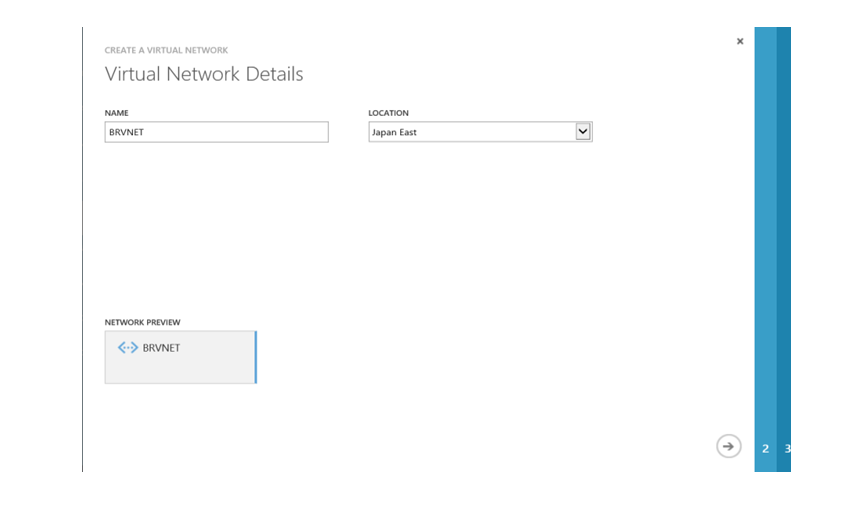
2) Specify the name of the virtual network and the region to create it in.
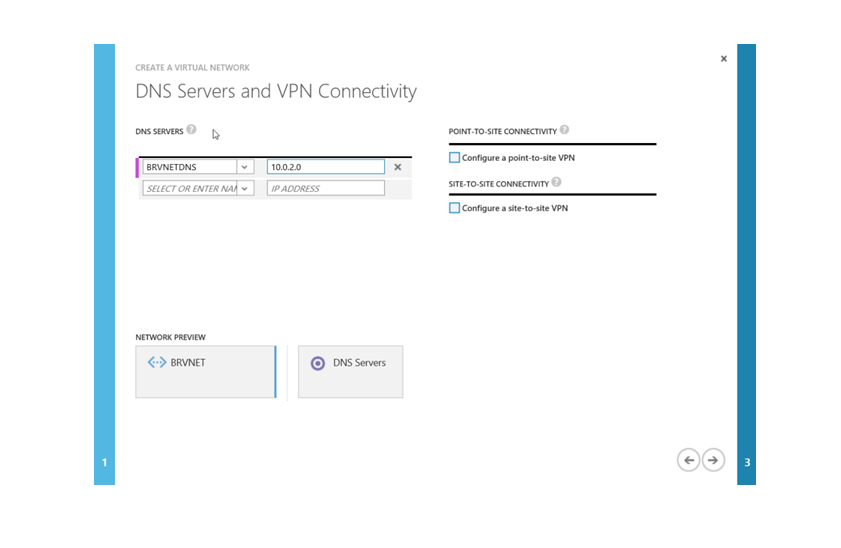
3) Specify a name for DNS and address range.
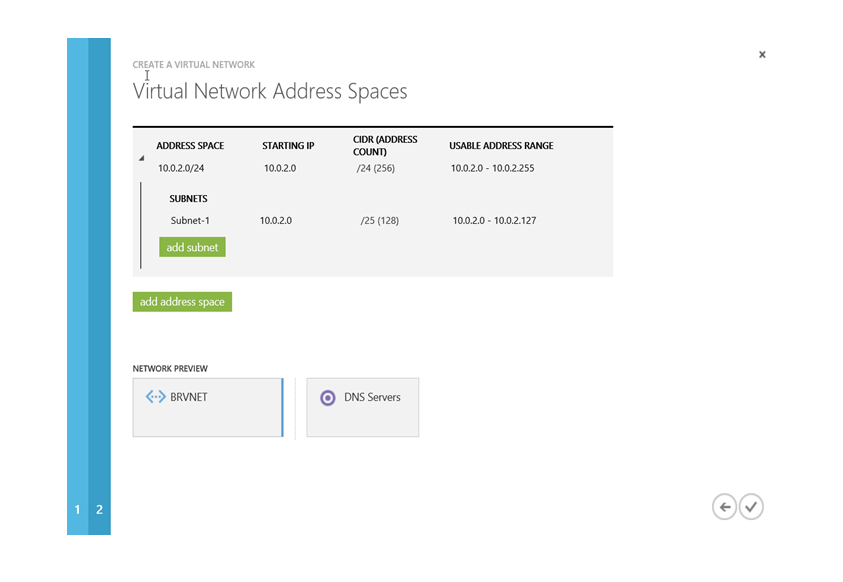
4) On the Virtual Network Address Spaces page, define the address spaces and subnets of the virtual network.
These are the private IPs that all resources (virtual machines and cloud service web and worker roles) will be assigned when deployed into this virtual network.
If you appreciate and want to know more about Microsoft Azure and it’s types, follow and read up.

Chandanakatta
Author
Hey there! I shoot some hoops when I’m not drowned in the books, sitting by the side of brooks.