OpenSpan Installation
System Requirements:
Component Requirement
Processor –>Dual core or faster processor
RAM–> 4 GB total RAM
Disk Space–> 150 MB
Operating system:
The following Windows operating systems are supported
• Windows 7 (32- and 64-bit)
• Windows 8.1 (32- and 64-bit)
• Windows 10 (32- and 64-bit) *
• Windows Server 2008 R2 (64-bit)
• Windows Server 2012 R2 (64-bit)
Browser:
Microsoft Internet Explorer versions 8-11 (32-bit) are supported. The 64-bit version of Internet Explorer 11 is also supported.
Other applications:
You must also have the following applications:
• Microsoft Visual Studio 2015 with Update 2 or 3. Update 3 is required for 8.0.1053 and build on later.
• Microsoft .NET Framework versions 2.0 (bundled with 3.5 SP1), 4.0, and 4.6
Installing the Robotic Automation Studio Plug-in using the Setup wizard:
Follow these steps to install the Robotic Automation Studio Plug-in
1. Download and unzip the Robotic Automation Studio Plug-in setup file into a temporary folder location.
2. Make sure Microsoft Visual Studio is closed. Then, run the installation executable file (OpenSpanPluginVS2015Setup.exe).
The Setup wizard starts.
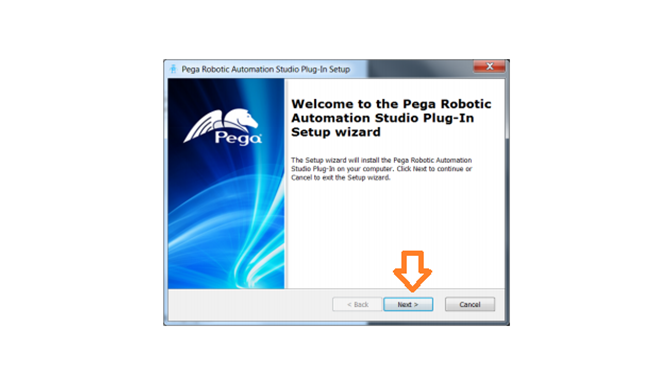
3. Click on Next to continue. The Pega Robotic Automation Office Support panel is displayed like below.
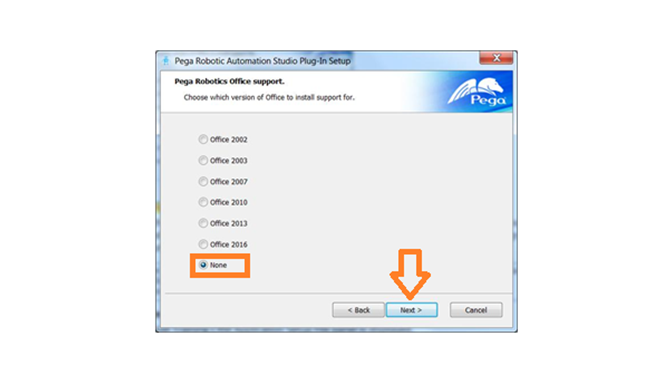
4. Select the version of Microsoft Office installed on this machine.
Select none, if Office is not installed on this machine. The installed version, if not listed, will not integrate Microsoft Office.
- Click on Next to continue.
The Training CRM Application Setup File panel is displayed.
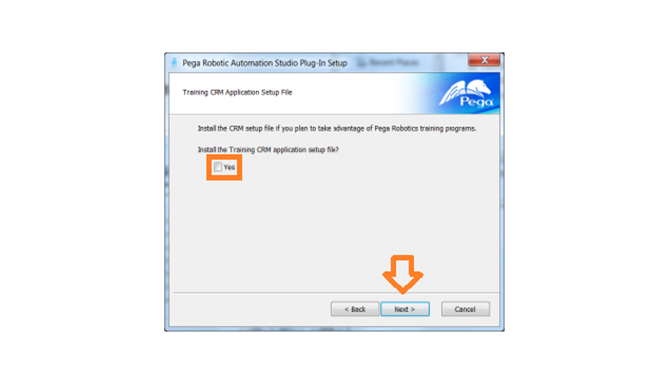
5. Click yes to install sample CRM Application Setup file that is used with the Robotic Automation Studio Plug-in training.
- Leave this check box unchecked if you do not want to install sample CRM application.
- The OpenSpan Services panel is displayed.
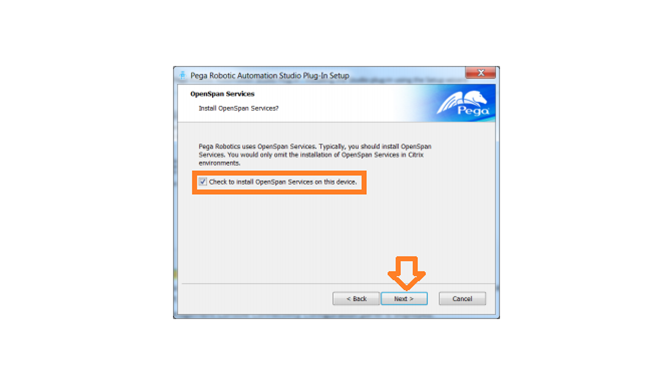
6. Make sure the box is checked to install OpenSpan services — unless instructed otherwise by Pega Support.
- Then, click on Next.
The Connectivity Configuration panel is displayed. On this panel you can choose to be connected to Robot Manager, Robotic Automation Deployment Portal, or nothing
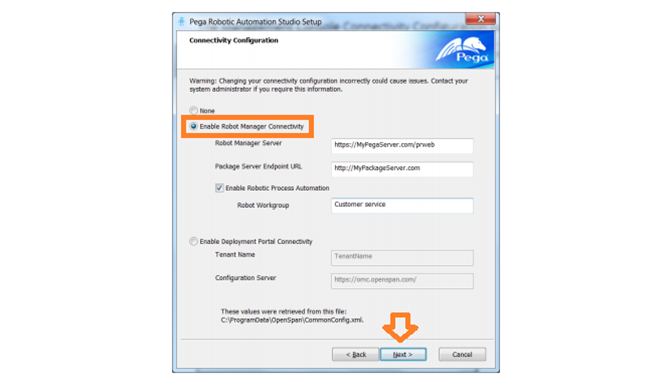
When Finished, click Next to continue.
The Robotic Desktop Automation (RDA) Integration panel is displayed.
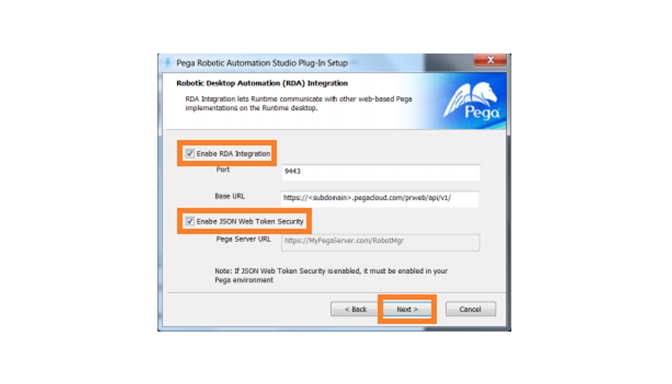
On this panel, you let the system know if the Robotic Automation Studio plugin will communicate with web-based Pega implementations and, if so, which port will be used.
You also use this panel to optionally enable JSON Web Token (JWT) Security.
After you make your entries, click on Next. The Installation Folder panel is displayed as follows.
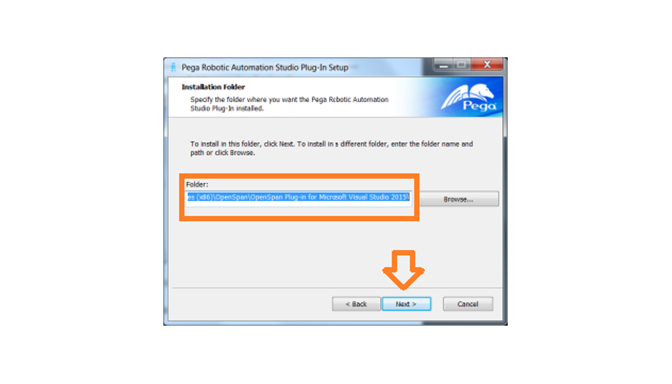
7. Accept the default installation folder for the Robotic Automation Studio plugin or click Browse to select a different location.
Click on Next to continue. Browser Extension Installation panel is displayed.
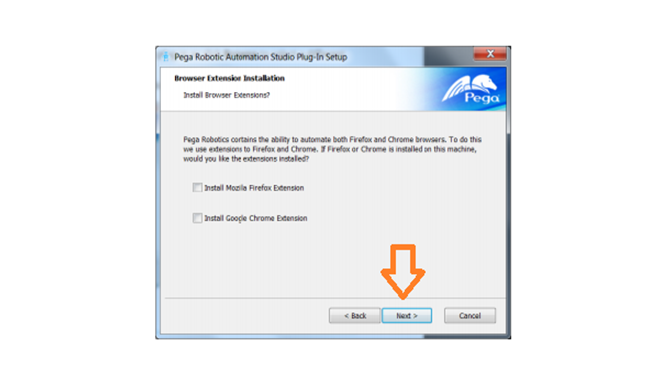
8. Check the appropriate browser extension boxes if you plan to automate other browsers in addition to Internet Explorer.
The Robotic Automation Studio plugin offers limited support for the browsers shown on this panel.
For more information, see the Application Support Matrix. Click on Next to continue. The Disclaimer panel is displayed.
9. Read the disclaimer, and if you agree to the terms, select the I accept these terms option.
Click on Next to continue. The Ready to install panel will be displayed.
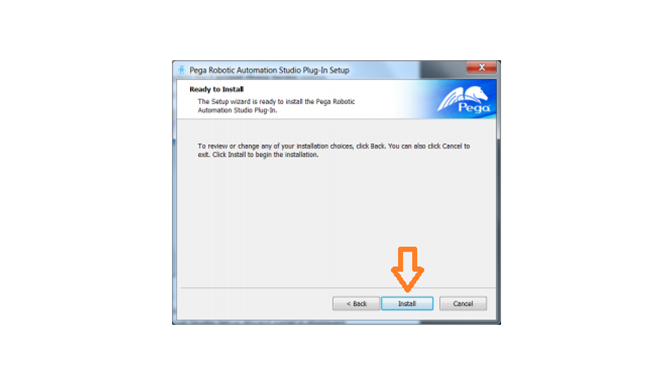
10. Click on Install to begin the Robotic Automation Studio Plug-in installation.
A panel shows the installation progress. When the installation is completed, the Completing Pega Robotic Automation Studio Plug-in for Microsoft Visual Studio Setup Wizard panel is displayed.
11. Click on Finish to exit the Setup wizard.
The Robotic Automation Studio Plug-in features will be available the next time you start Visual Studio.
In this page, you have learned about How to Setup and install the OpenSpan. You can gain more knowledge by seeing this blogs.

Chandanakatta
Author
Hey there! I shoot some hoops when I’m not drowned in the books, sitting by the side of brooks.