MuleSoft SetUp
Installation, Management, and Deployment
To get started with a local installation of Mule Runtime, Download, and Start Mule Runtime.
You can deploy Mule applications to MuleSoft’s cloud platform via CloudHub and manage them via Runtime Manager. Runtime Manager can be used to manage local deployments as well, making it more accomplished than it’s forerunner Mule Management Console, which is used for local Mule deployments.
MuleSoft is available in two editions:
- Community edition.
- Enterprise edition.
Community edition: It is a free edition developer that you can directly download and use straight away.
Enterprise edition: It is a rather commercial edition, so it has a lot of advantages than Community edition.
MuleSoft provides Enterprise edition – 30 day free trial version, which you can try at your own will.
To implement MuleSoft flows, we need Anypoint Studio, which is basically Eclipse based IDE, specially design to do Mule Development.
JDK Installation:
Before installing Anypoint Studio, you should have JDK on your machine.
- You can download the new version of JDK from this link – Oracle.
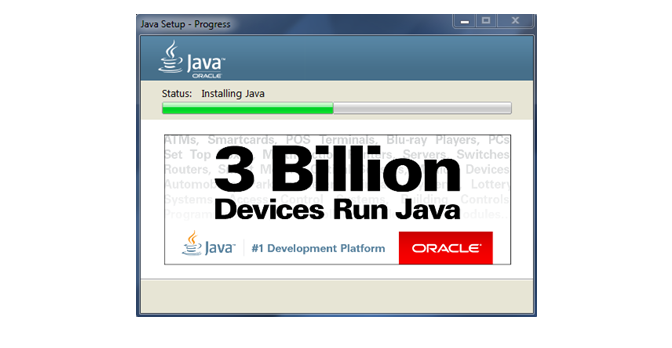
- Just download the software and start the installation. It is direct and simple. Just click on next and continue.
- Enable Java Content in the Browser should be enabled.
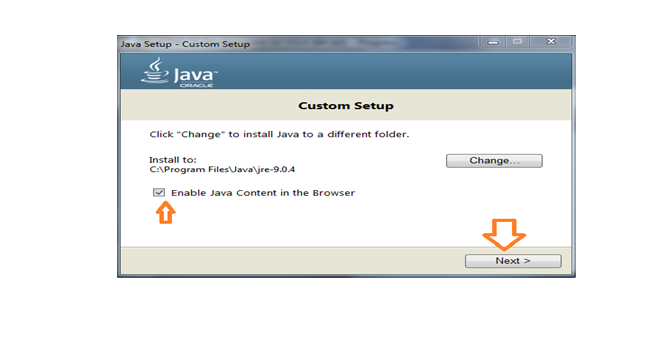
- After installation, you can close the tab, successfully installing JDK on your machine.
Anypoint Studio Installation:
Anypoint Studio is available in three versions: Windows, MAC and Linux OS.
- You can download MuleSoft from this link – Mulesoft Studio.
- Once you open the link, you will come across “Download Studio” option. Click on that to head to the next page.
It will redirect you to another page and ask your details. Fill in and select “Download” option. Once you select it, you will be asked about your operating system type, like the below given image. Kindly select anyone with respect to your operating system.
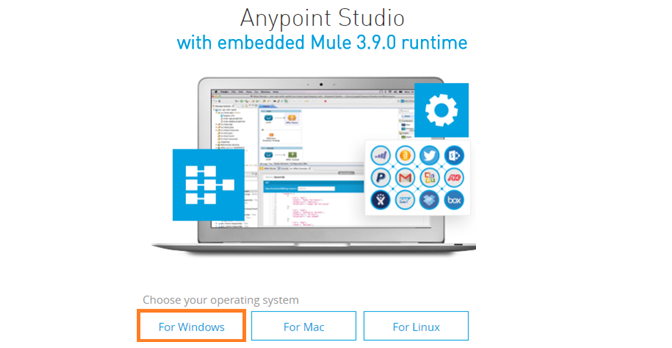
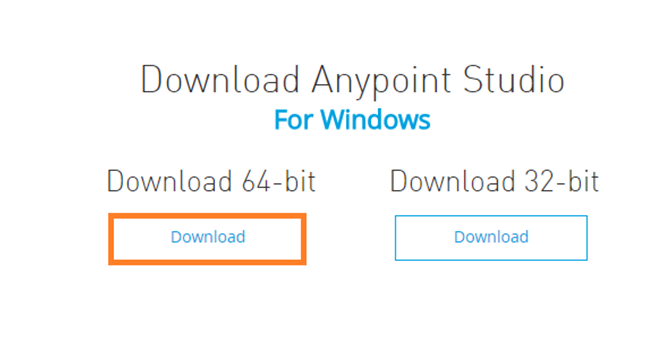
- Here, I am choosing Windows.Next, it will ask Operating system type like shown below. Select any one with respect to your OS.
Installation Process:
- Once you download the software, unzip the folder and save the folder in “C drive”.
- While installing, it will ask for the path, which could result in a mismatch, so it’s always better to keep the folder in C drive.
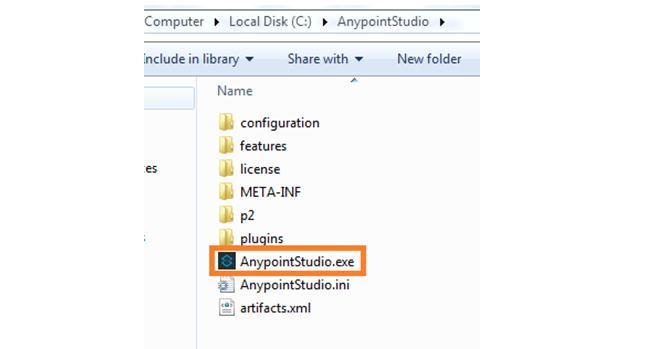
- Open the folder and right click on AnypointStudio.exe and run the folder.
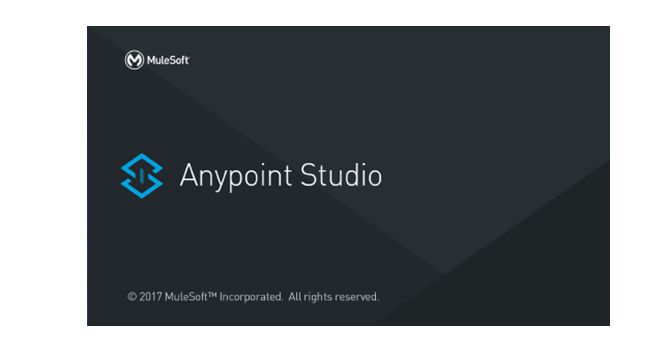
- The installation process will be start like shown below.
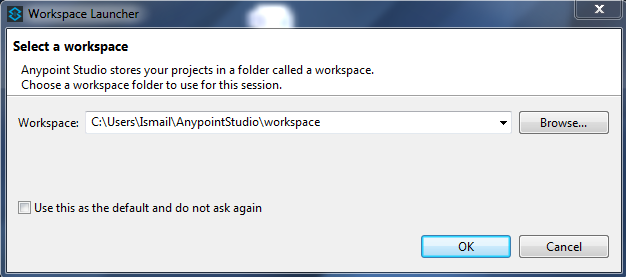
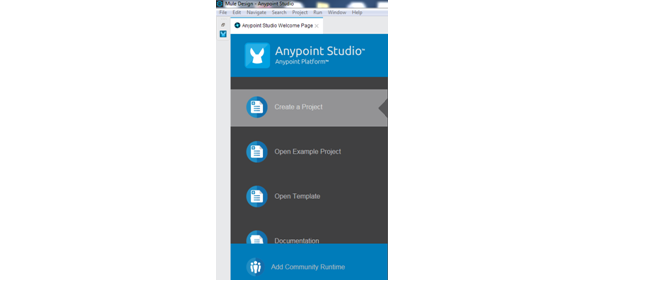
- Click on OK to complete the installation. The tool will open like shown below.
- The above process is same for “muleESB enterprise runtime” and “mule ESB community runtime”installation.
Create a package:
Here, I am trying to create a basic Project.
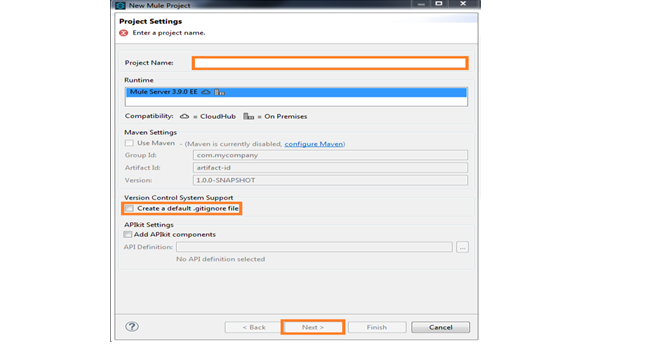
1. First, we have to give a Project name and enable “Create a default .gitignore file“.
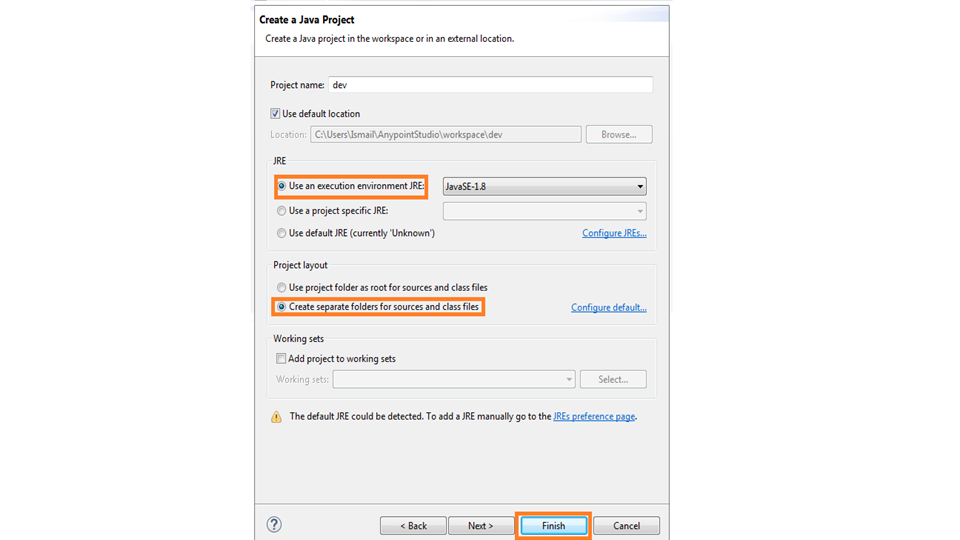
2. Enable Use an execution environment JRE. Under Project Layout, click on the option Create separate folders for sources and class files, as shown in the image below.
3. The project looks like the image below. We can do a lot of operations in these project.
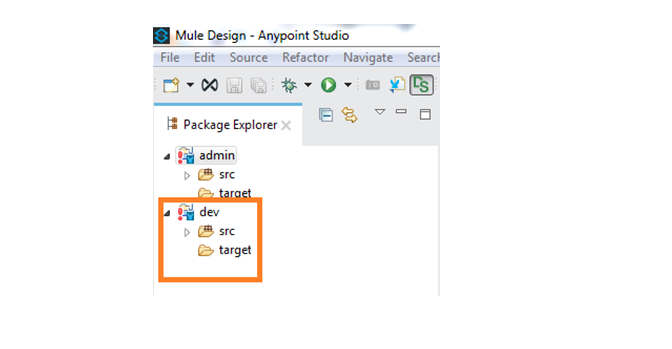
We have successfully created a project. Now, in a similar way, create a new project.
Here, in the next session you can go through Certification blog.

Arun Gandham
Author
Hola peeps! A fitness freak, a lover of games, I catch a flick on the weekends and write for you about current trends.