AWS IAM User Creation
AWS IAM User Creation
What is it?
Identity and Access Management(IAM). You use IAM to control who is authenticated(signed in) and authorized(has permissions) to use AWS resources.
It comprises of users, Groups and Roles.
It is with these three in combination with AWS policies that customers design the identity and access management to the account.
To start using IAM, you must subscribe to at least one of the AWS services that are integrated with IAM. You then can create and manage users, groups, and permissions.
What is a USER?
An IAM user doesn’t have to represent any person necessarily. A user can be an individual, system, or application requiring access to AWS services.
You can permit a user to access any or all of the AWS services (integrated with IAM). In addition, if one AWS account has access to resources from another, its users may be able to access data under other linked accounts as well.
Any AWS resources created by a user are under control of and paid for by its AWS account. A user cannot independently subscribe to AWS services or control resources.
What are the credentials of an IAM user?
Console password: A password that the user can type to sign in to interactive sessions such as the AWS Management Console.
Access keys: Combination of an access key ID and a secret access key which can be used to make programmatic calls to AWS when using the API in program code or command prompt.
Other Credentials: User can be assigned SSH key for AWS Code Commit Service and SSL/TLS certificates to authenticate with some AWS services.
By default, a brand new IAM user does not have any kind credentials, no permissions and is not authorized to perform any AWS actions or to access any AWS resources.
To assign permissions to users individually the best practice is to create Groups and assign policy and permissions to the groups and then designate Users to specific groups. This applies to admin and non-admin users as well.
What is a GROUP?
A Group is a collection of IAM users. Groups specify permissions for multiple users making it easier to manage the permissions. A group is not truly an “identity” in IAM because it cannot be identified as a Principal in the permission policy. It is simply a way to attach policies to multiple users at one time.
Important features:-
(a) A group can contain many users, and a user can belong to multiple groups.
(b) Groups can’t be fixed. They can contain only users, not other groups.
(c) There’s no default group that automatically includes all users in the AWS account.
(d) There’s a limit to the number of groups you can have and how many groups you can be in.
What are ROLES?
The role of an IAM is similar to that of a user, in that it is an AWS identity with acceptance policies that define what the identity can and cannot do in AWS. However, instead of being associated with one person, a role is meant to be taken by anyone who needs it.
A role does not have any credentials (password or access keys) linked to it. Rather, if a user is assigned to a role, access keys are created dynamically and provided to the user.
The IAM Role provides a means for authorized access to users, applications, or services that don’t normally have access to AWS resources.
Another key use of the IAM Role is to give AWS access to users who already have identities defined outside of AWS, such as in a corporate directory. For these scenarios, you can delegate access to AWS resources using an IAM role.
Steps for creating an IAM
(1) Firstly, you need to Login to your AWS console.
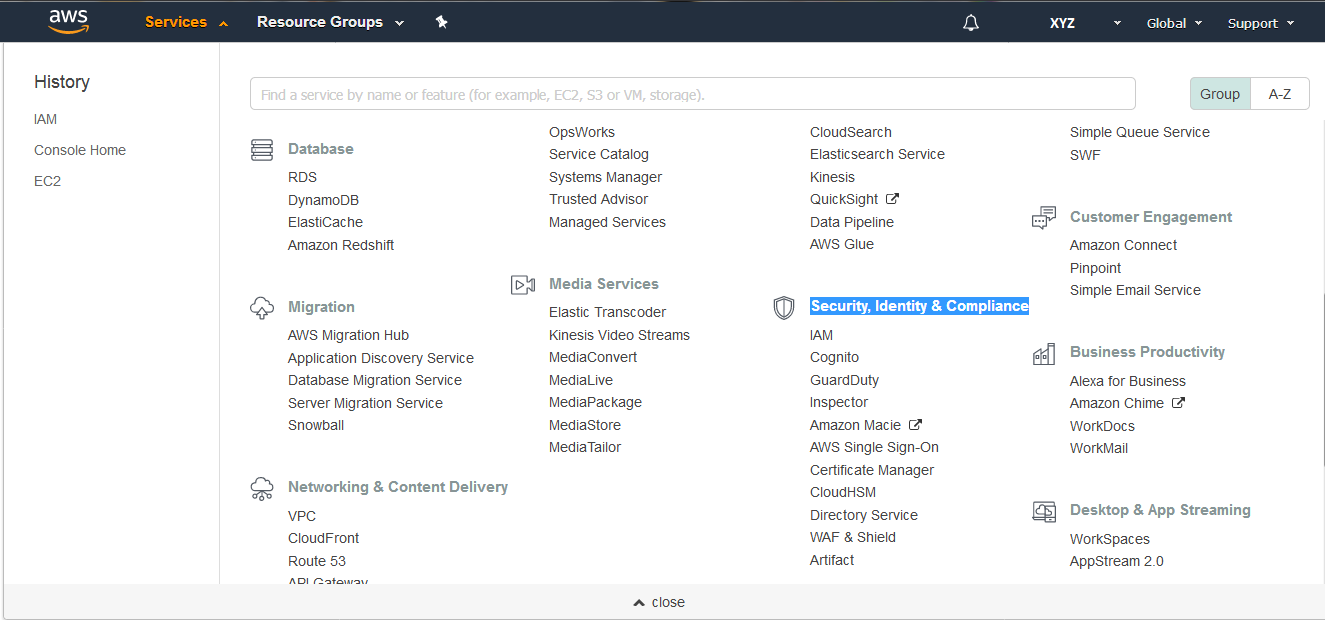
(2) Then, under Services select IAM under Security, Identity & Compliance as shown below.
(3) After selecting IAM under Security, Identity & Compliance, the following Screen will appear. Select Users.
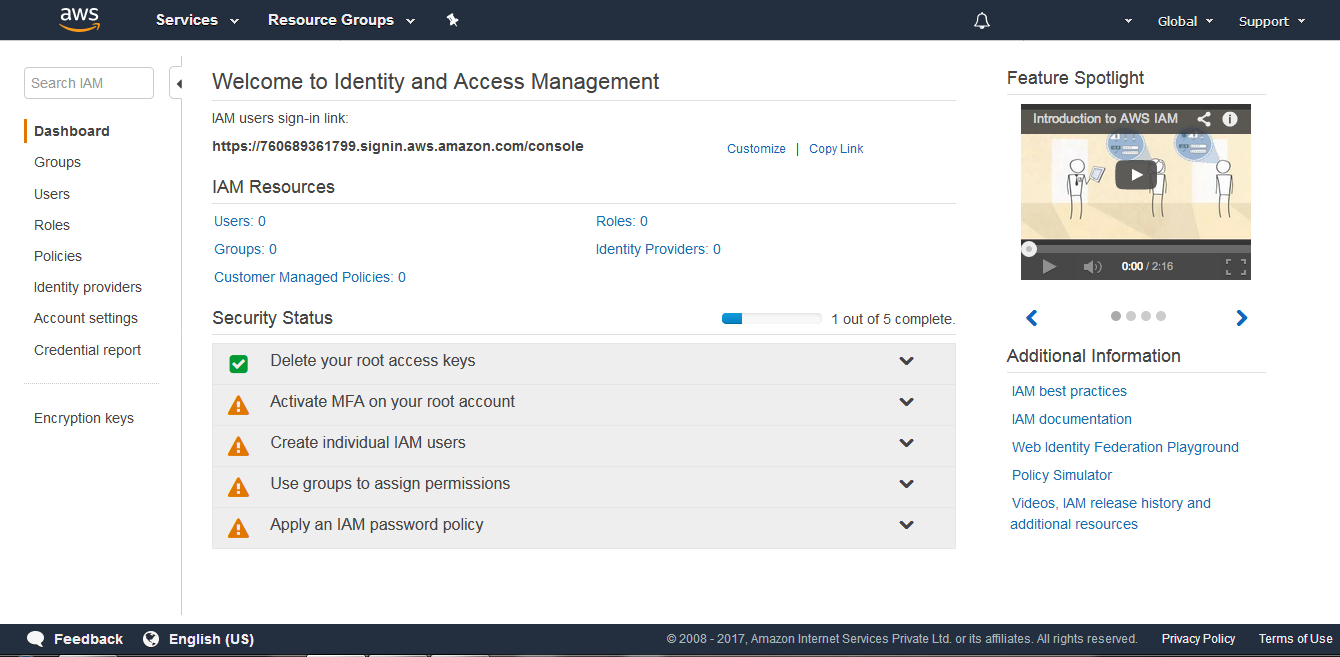
(4) On selecting Users the following screen appears. Click on Add user to add a new user.

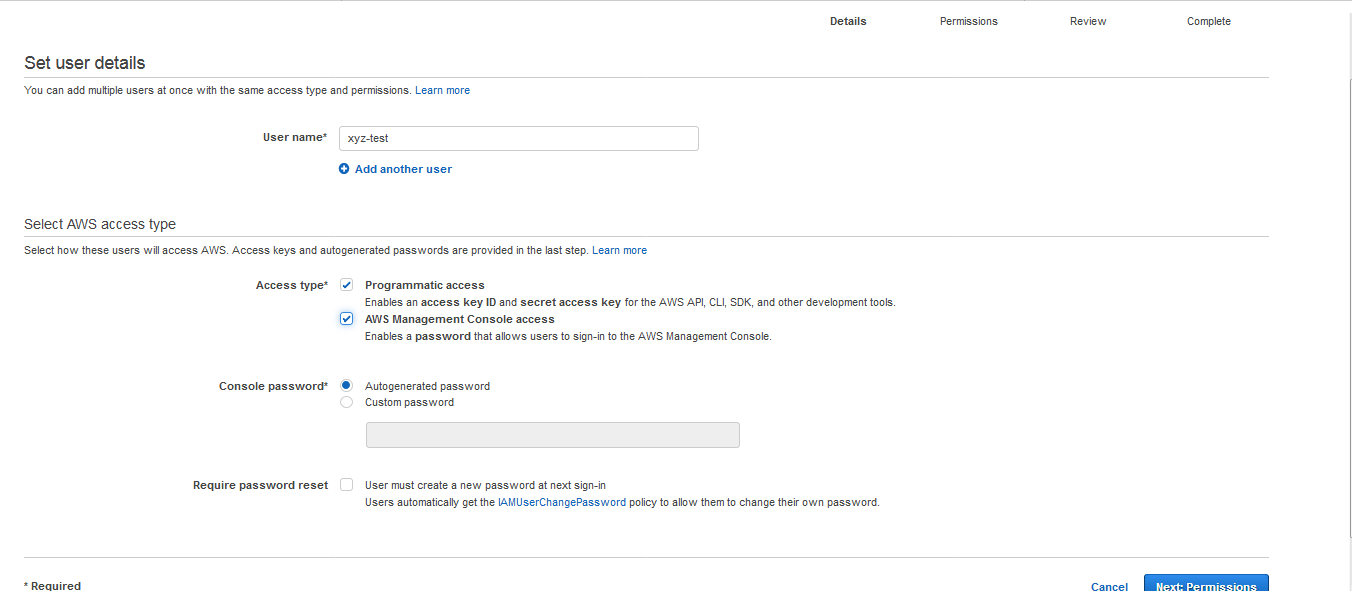
(5) On clicking on the Add user the following screen appears where you need to set user details.
ie; provide Username*, Access type*, Console password*. Then click on Next: Permissions.
(6) After clicking on Next: Permissions, the following screen appears stating Set permissions for xyz-test.
ie; Add user to the group (or) Copy permissions from existing user (or) Attach existing policies directly. Select the required option and click Next: Review.

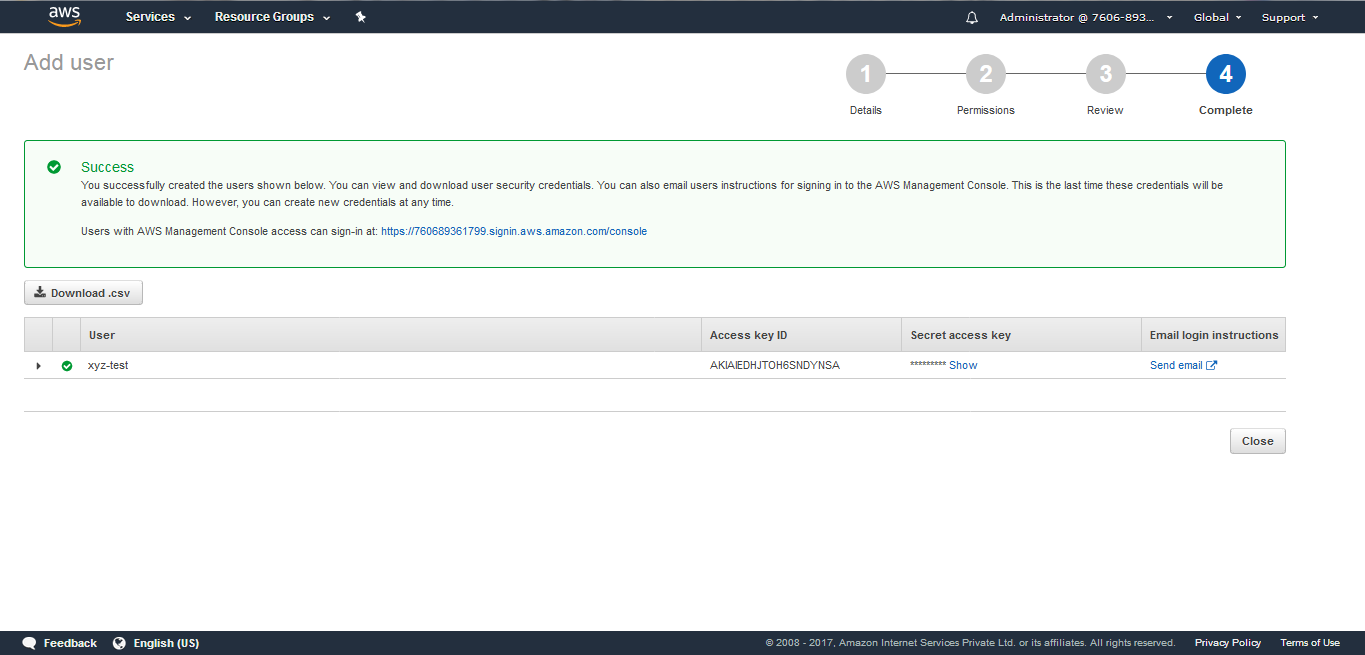
(7) After clicking on Next: Review the following screen appears. Click on Create user.
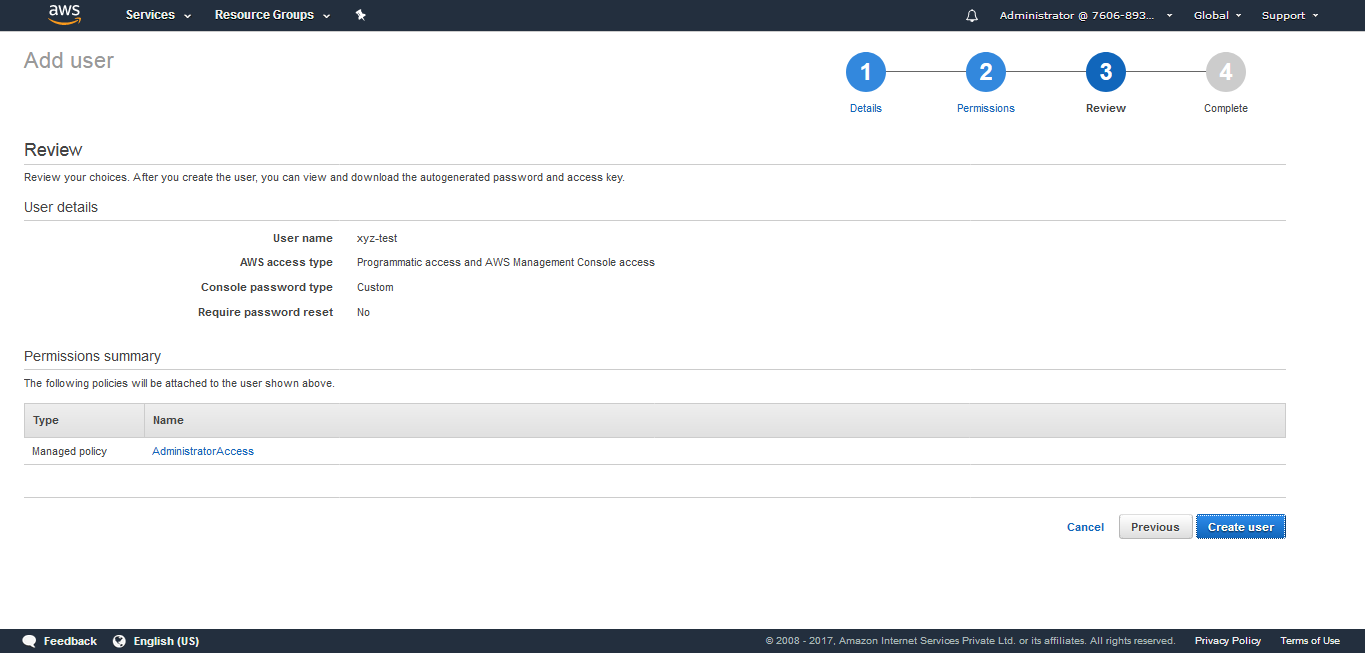
(8) The “User” gets successfully created with an Access Key ID and Secret access key.

Nitesh
Author
Bonjour. A curious dreamer enchanted by various languages, I write towards making technology seem fun here at Asha24.