Informatica IDQ Setup
IDQ Installation:
Welcome to putting forward a first new step towards a prolific career in data management.
Firstly, I would like to suggest you to install Database. It’s a direct installation process. just click next and next.
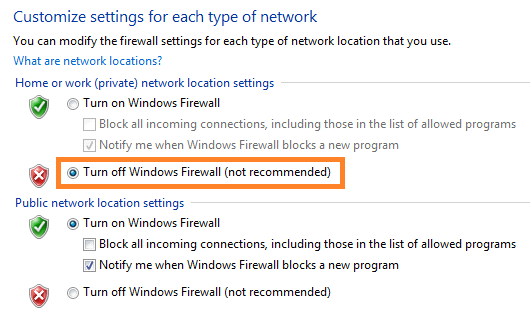
1) The first check point – disable the Windows Firewall.
Go to Control Panel.
2) Now, open the data base, and extend a table space, because while installing Informatica IDQ, it creates lot of repository tables at backend and provides lot of services. You have to then extend the table space and use below code.
CREATE BIGFILE TABLESPACE CMX_DATA
NOLOGGING
DATAFILE ‘c:\app\cyberknife\oradata\orcl\CMX_DATA1.DBF’ SIZE 2048M REUSE
EXTENT MANAGEMENT LOCAL;
CREATE BIGFILE TABLESPACE CMX_INDX
NOLOGGING
DATAFILE ‘c”:\app\cyberknife\oradata\orcl\CMX_INDX1.DBF’ SIZE 2048M REUSE
EXTENT MANAGEMENT LOCAL;
CREATE BIGFILE TABLESPACE CMX_TEMP
NOLOGGING
DATAFILE ‘c”:\app\cyberknife\oradata\orcl\CMX_TEMP1.DBF’ SIZE 2048M REUSE
EXTENT MANAGEMENT LOCAL;
postinstallsetup.bat -Ddatabase.password=tiger
3) In next step create Domain, Repository and all useful tables as mentioned fallowing.
1) Domain
CREATE USER INFA_DOMAIN IDENTIFIED BY TIGER
GRANT DBA TO INFA_DOMAIN
2) Repository
CREATE USER INFA_REPO IDENTIFIED BY TIGER;
GRANT DBA INFA_REPO;
THE FOLLOWING SCHEMAS REQUIRED TO INSTALL IDQ
1) Model Repository Service
CREAT USER IDQ_MRS IDENTIFIED BY TIGER
GRANT DBA TO IDQ_MRS
2)Profiling
CREAT USER IDQ_PWH IDENTIFIED BY TIGER
GRANT DBA TO IDQ_PWH
3)Content Services
CREAT USER IDQ_CMS IDENTIFIED BY TIGER
GRANT DBA TO IDQ_CMS
4)Human Task
CREAT USER IDQ_HT IDENTIFIED BY TIGER
GRANT DBA TO IDQ_HT
5) Auditing Tables
CREAT USER IDQ_AUDIT IDENTIFIED BY TIGER
GRANT DBA TO IDQ_AUDIT
6) Connection
CREAT USER IDQ_CONN IDENTIFIED BY TIGER
GRANT DBA TO IDQ_CONN
Get Free Informatica IDQ Materials
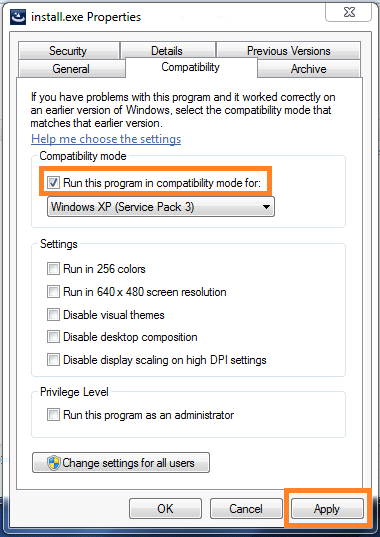
3) It’s time to Unzip the IDQ software which you downloaded. Following that, Open server folder and go to install.exe. Right click on it and change the Properties as shown below.
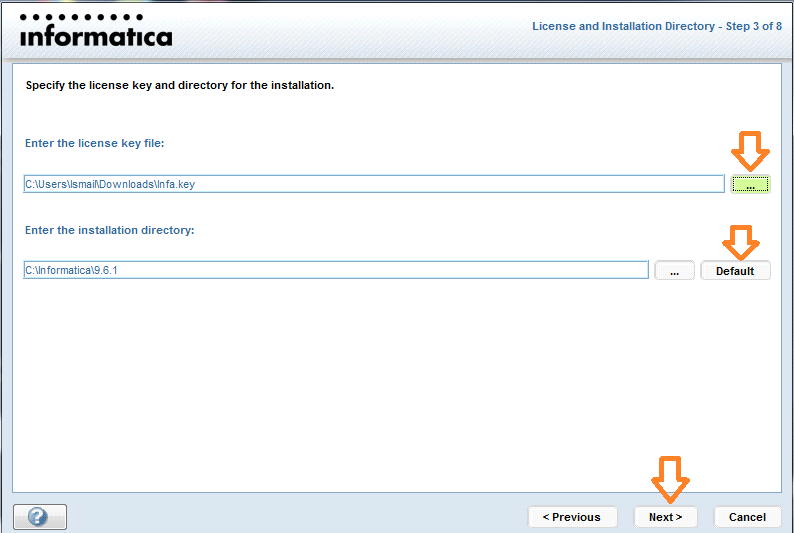
4) After that, run install.exe as Administrator. The installation process will be continued as follows.
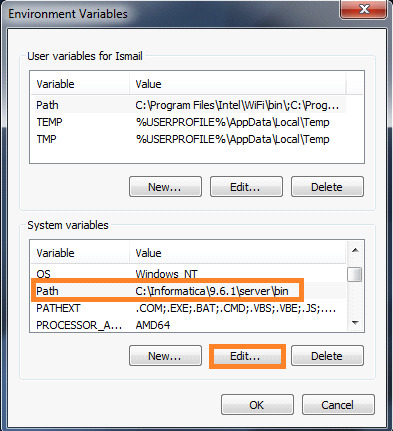
5) Check point – Change the Path in Environment Variable tab.
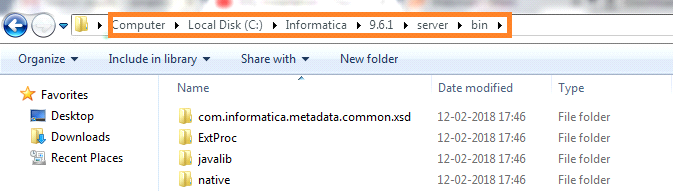
6) Copy the below Highlighted path.
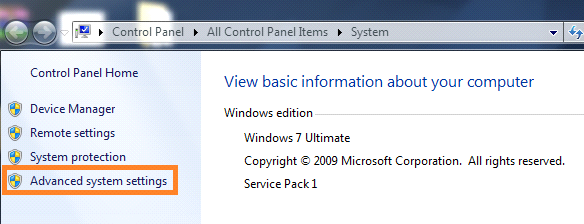
7) Go to Control Panel –> Advanced System Settings.
8) I would now suggest you to change the path as shown in the image given below.
9) Give Database User Id, Password and enable JDBC URL.
10) Now, it would be ideal to give Keyword something like tiger or tiger. Click on Next.
11) Verify highlighted thing given below and Click on Next. Disable the below highlighted box and click on Next.
12) You must now Open the Below Highlighted Link. Go ahead and type in Username and Password.
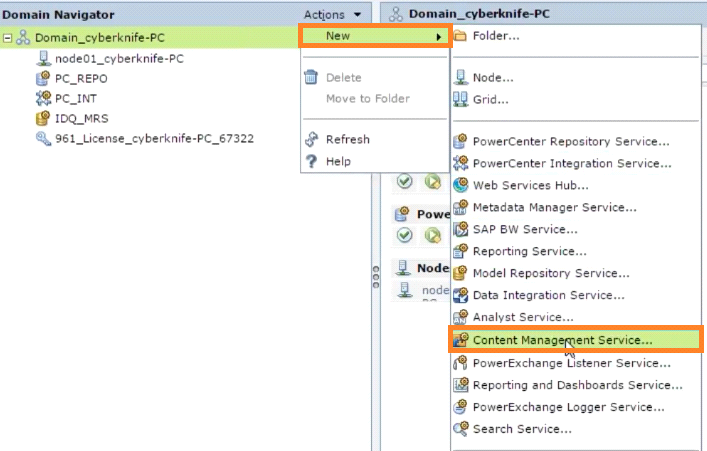
13) Next Process, Create Repository Service. Follow the below steps and give the credentials as shown in the images below.
14) After giving the User Name and Password, the tool will Open.

This installation, I agree, is long, but not really tedious. You have to agree, it’s fairly easy. Once you have it, it’s your rock forever!
If you wish to know more, read my blog on Certification in IDQ. Click here to find the Holy Grail!

Arun Gandham
Author
Hola peeps! A fitness freak, a lover of games, I catch a flick on the weekends and write for you about current trends.