AWS CloudFront Tutorial – Setting up of CloudFront
What is Cloud Front?
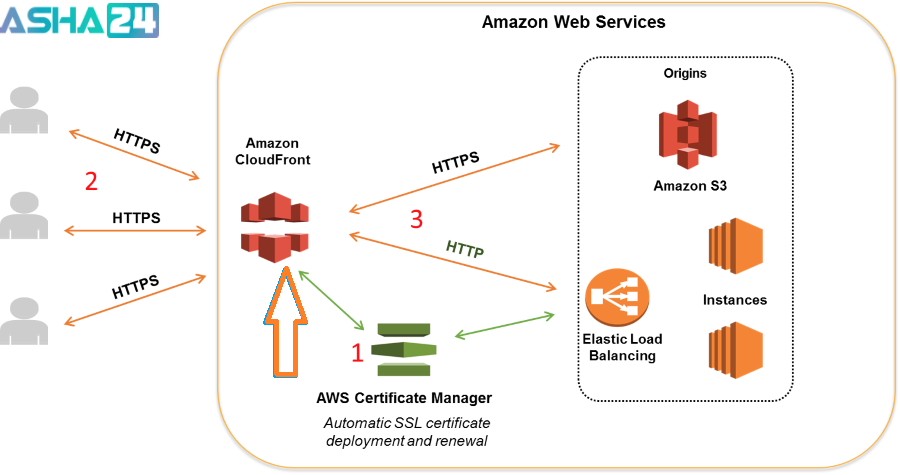
AWS Cloud Front is a global content delivery network. It delivers data, videos, applications, and APIs to the users with no latency and high transfer speeds.
Cloud front is integrated with the source and target which are in turn directly connected to the AWS global infrastructure.
Start with Cloud Front:
You can use Cloud Front to:-
1) Store the original versions of your objects in one Amazon Simple Storage Service (Amazon S3) bucket.
2) Distribute download content such as text or graphics.
3) Make your objects accessible to everyone
4) Use the Cloud Front domain name in URLs for your objects instead of your own domain name (for example:Domain).
5) Keep your objects in Cloud Front edge locations for the default duration of 24 hours. (The minimum duration is 0 seconds.)
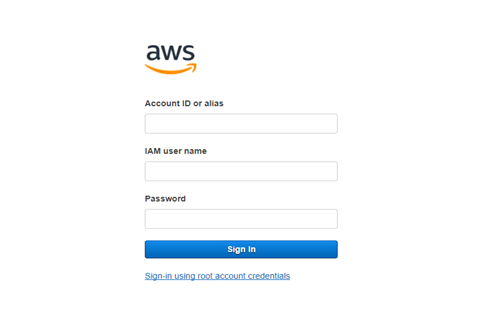
Step 1: Sign up for Amazon Web Services:
To Sign up for Amazon Web Services at.
If you don’t have an account, create one using the link above.
Step 2: Upload your content to Amazon S3 and grant object permissions:
Amazon S3 bucket is a container for objects and folders. Objects contain data and Cloud front distributes these objects using buckets as a source.
We can create multiple buckets, and there is no limit to the amount of data that you can store on Amazon S3.
By default Amazon S3 bucket and its objects are private. Only the AWS account that created the bucket has permission to read and write objects in it.
If you want to allow someone to use your cloud front URL, you must provide public read permission to those objects.
To upload your content and grant read permission on Amazon you could follow these steps:-
1) Sign in to the AWS Management Console and open the Amazon S3 console at.
2) In the Amazon S3 console, choose “Create Bucket”
3) In the Create Bucket dialog, enter a bucket name.
4) Select a region from your bucket.
5) Choose “Create”
6) Select your bucket in the Buckets pane and choose “Upload”
7) In the Upload section, Select “Files page” then choose “Add Files” and choose the files that you want to upload
8) Choose “Start Upload”

Enable public read privileges for each object that you upload to your Amazon S3 bucket. Here’s how you can do it:-
1) Choose “Set Details”
2) On the Set Details page, choose “Set Permissions”
3) On the Set Permissions page, choose “Make everything public”
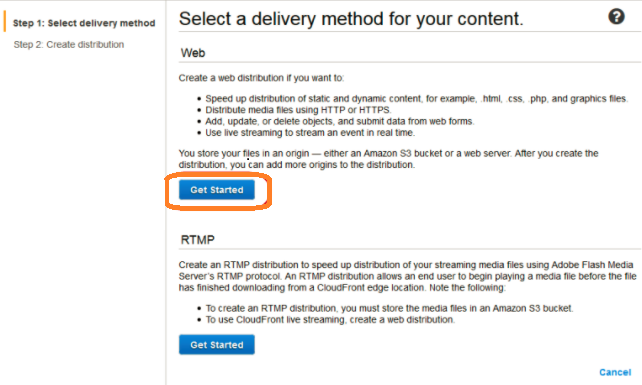
Step 3: Create a Cloud Front Web Distribution:
To set cloud front distribution you can follow these steps:-
1) To Open the CloudFront console.
2) Choose “Create Distribution”
3) In the ‘Select a delivery method for your content’ page, choose “Get Started”
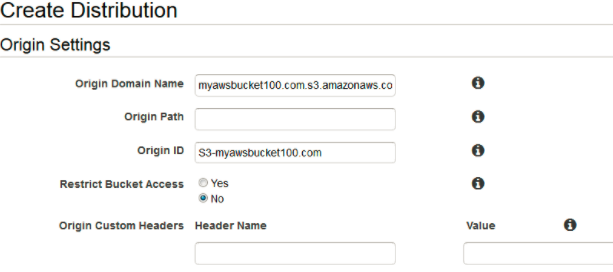
4) In the ‘Create Distribution’ page, under ‘Origin Settings’, choose the Amazon S3 bucket that you created earlier.
For the options of Origin ID, Origin Path, Restrict Bucket Access, and Origin Custom Headers, accept the default values.
5) Under Default Cache Behavior Settings, accept the default values:
a) Forward all the requests that you use the CloudFront URL for your distribution to the Amazon S3 bucket that you specified in Step 4.
b) Allow end users to use either HTTP or HTTPS to access your objects.
c) Respond to requests for your objects.
d) Cache the objects at CloudFront edge locations for 24 hours.
e) Forward only the default request headers to your origin and not cache your objects based on the values in the headers.
f) Eliminate cookies and query string parameters, if any, when forwarding requests for objects to your origin. (Amazon S3 doesn’t process cookies and processes only a limited set of query string parameters.)
g) Don’t configure to deliver the media files in the Microsoft Smooth Streaming format.
h) You can give content access to everyone.
i) Don’t automatically compress your content.
6) Under Distribution Settings, enter the applicable values:
Price Class: Select the price class that corresponds to the maximum price that you want to pay for CloudFront service.
By default, CloudFront serves your objects from edge locations in all CloudFront regions.
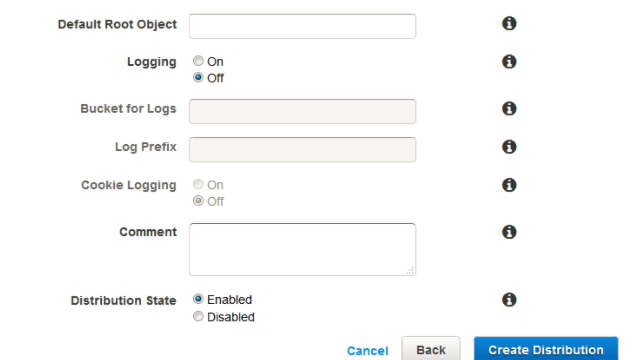
7) Choose “Create Distribution”
8) After CloudFront has created your distribution, the value of the Status column for your distribution will change from ‘In Progress’ to ‘Deployed’.
If you chose to enable the distribution, it will then be ready to process requests. This should take less than 15 minutes.
Step 4: Test your links
After you’ve created your distribution, CloudFront can locate your Amazon S3 server and you know the domain name associated with the distribution.
You can create a link to your Amazon S3 bucket content with that domain name, and have Cloud Front serve it.
To link to your objects:-
Copy the following HTML into a new file:
a) Replace with the domain name that CloudFront assigned to your distribution.
b) Replace with the name of a file in your Amazon S3 bucket.
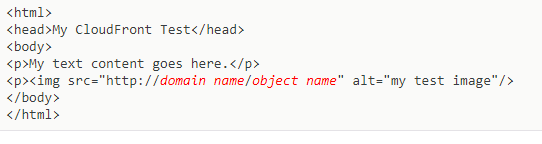
(1) Save the text in a file that has a ‘.html’ filename extension.
(2) Open your web page in a browser to ensure that you can see your content. If you cannot see the content, confirm that you have performed all of the steps correctly.
The browser returns your page with the embedded image file, served from the edge location that CloudFront determined was appropriate to serve the object.For more details can refer here.

Arun Gandham
Author
Hola peeps! A fitness freak, a lover of games, I catch a flick on the weekends and write for you about current trends.