AWS VPC Tutorial – 2018
VPC Setup
What is VPC?
Joining the market among the three major cloud Services like Public, Private and Hybrid are Virtual Private Clouds (VPC).
VPC is a private cloud located inside a public cloud that enables you to experience the benefits of a virtualized network while using public cloud resources.
It is related to the public cloud, but they are not the same. Instead of sharing resources and space in a public infrastructure, you get a changeable allotment of resources to configure.
Virtual Private Clouds and private clouds are the same. Whereas Private clouds are entirely dedicated to the organization including hardware, Virtual Private clouds do not have the same hardware dedication and just creates a more secure environment on public infrastructure.
Just like a VPN, we use them to send messages over the public internet in a secure way as is done on a personal network.
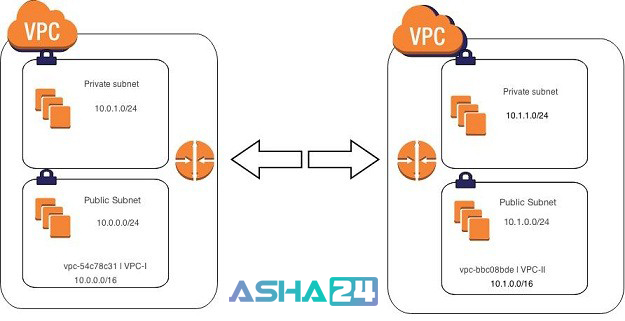
What Is Amazon VPC?
Amazon Virtual Private Cloud (Amazon VPC) enables you to launch AWS resources into a virtual network that you have defined.
This virtual network closely resembles a traditional network that you’d operate in your own data center, with the benefits of using the scalable infrastructure of AWS.
VPC Setup
You can set up the VPC in the following five fluid steps
Step: 1 Create The VPC:
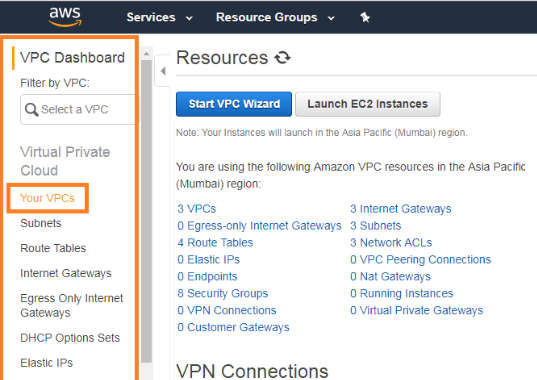
1) Login to AWS Go to services search bar type VPC
Click “YourVPC’s” option on left side
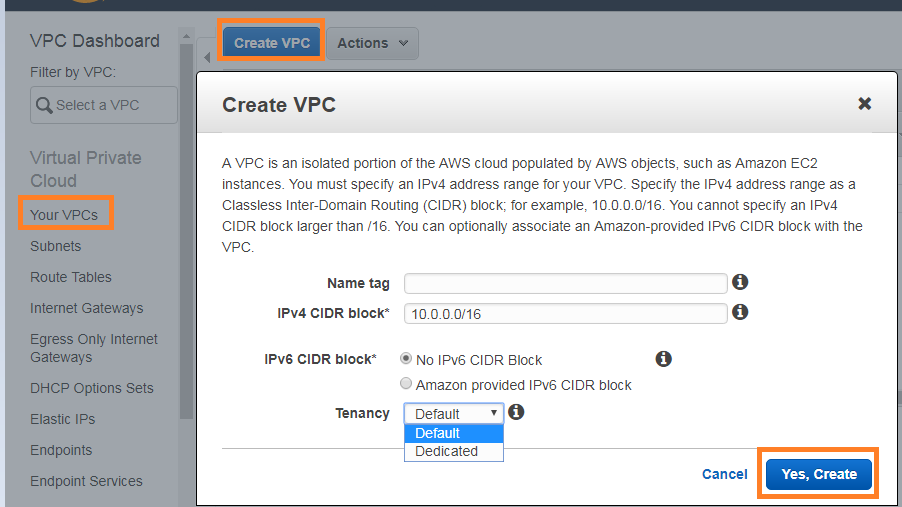
Click on Create VPC

Specifies a set of IP addresses in the form of IPv4 Classless Inter-Domain Routing (CIDR) block (for example, 10.0.0.0/16) and check IPv6 CIDR block.
Tenancy:
Default Tenancy: This is for running instances on shared hardware and is free of charge.
Dedicated Tenancy: This is for running your instances on single-tenant hardware. A $2 fee applies for each hour in which any dedicated instance is running in a region.
Specify the following VPC details and then click “Yes, Create”.
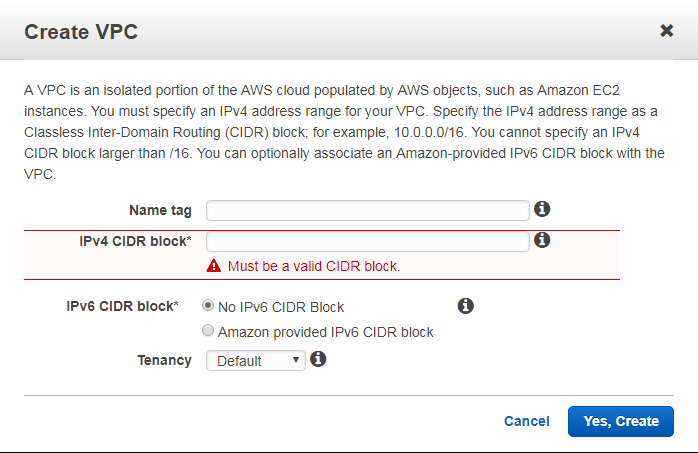
Note:
Here we have mandatory blocks Ipv4 CIDR block and Ipv6 CIDR block.
If we not specify Mandatory blocks then it will show an error.
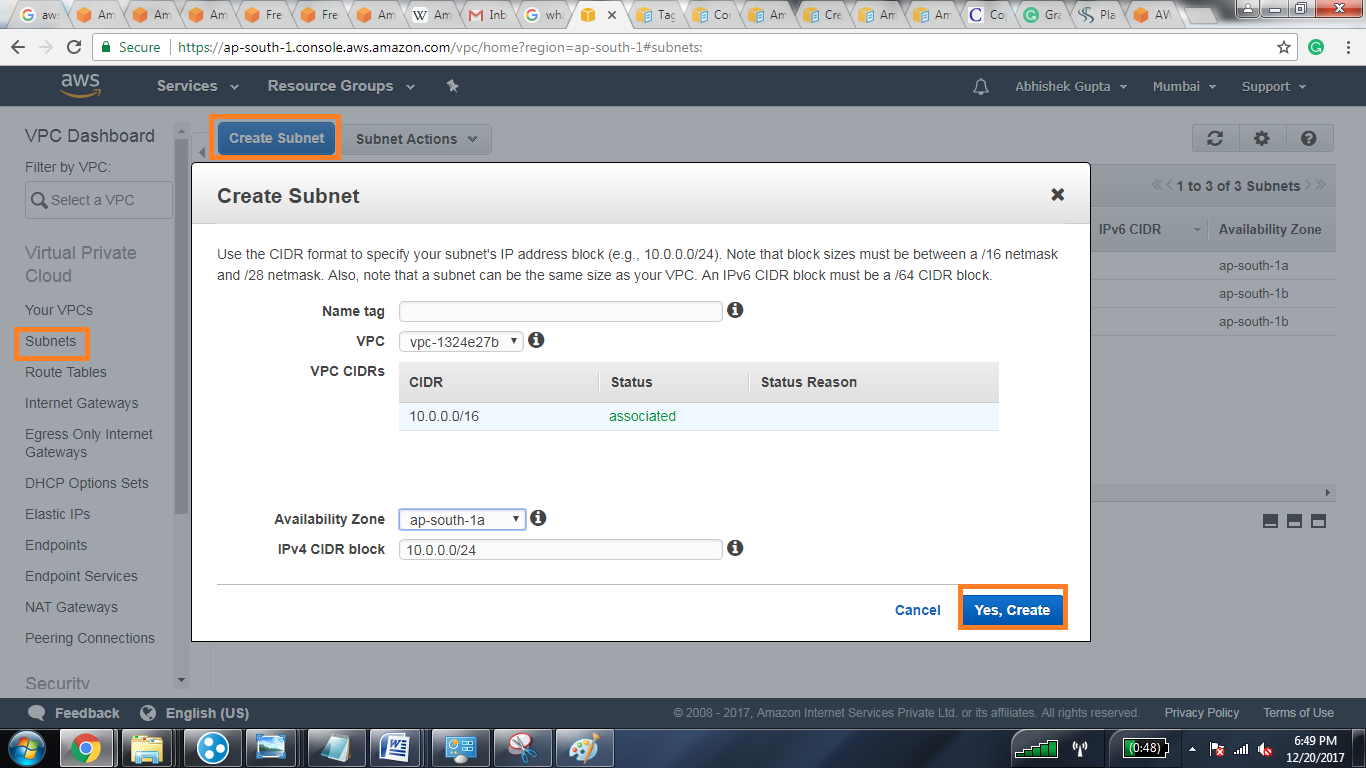
2) Subnets:
Click “Create Subnet” option on left side
You should create subnets across multiple availability zones, with each subnet residing within a single zone.
Creating subnets in and launching instances across multiple availability zones will ensure a high-availability environment.
For this example, we created subnets using zones us-east1b and us-east-1d. These subnets are called “private subnets” because the instances we launch are not accessible from the Internet.
Always choose the same Amazon Availability Zones for all tiers.
For example, if you choose two zones for high availability and use us-east-1a and us-east1b, then maintain that same 1a and 1b zones for all tiers.
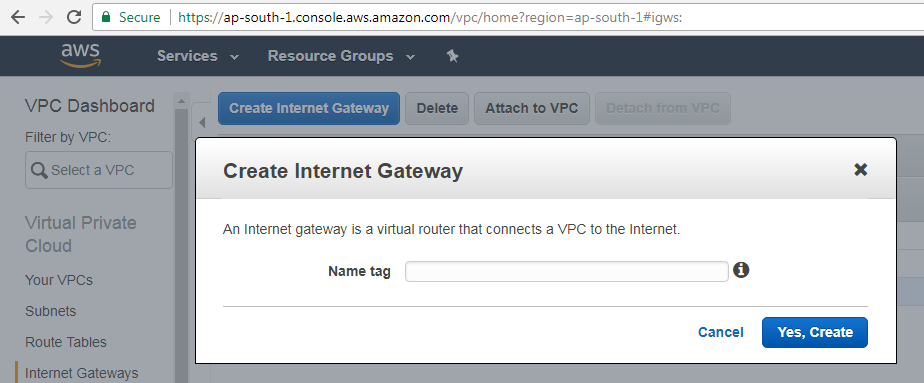
3) Create Internet Gateway:
Click Internet Gateway on the left side:
By default, instances that are launched into a VPC can’t communicate with the Internet.
Internet gateway is a virtual router that connects a VPC to the Internet.
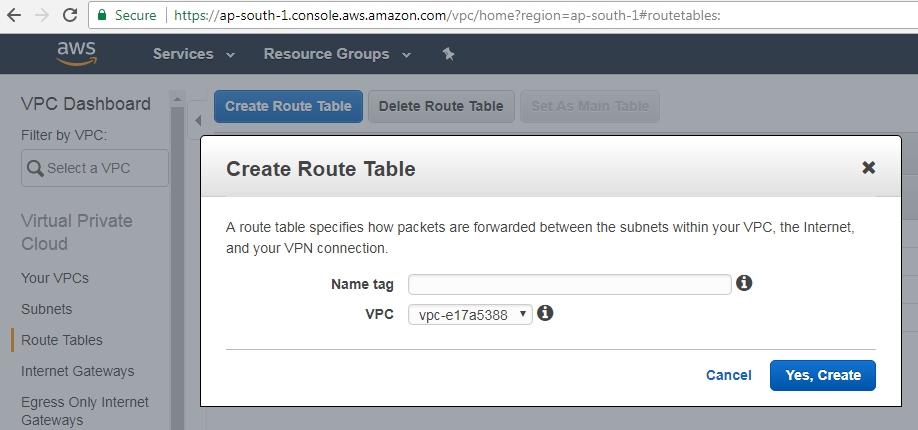
4) Create Route table:
Click Route option on the left side.
Route table contains a set of rules, called routes that determine where network traffic is directed.
Each subnet in your VPC must be associated with a routing table that will control that subnet’s routing.
You can associate multiple subnets with a single route table; however, you can only associate a subnet with one route table.
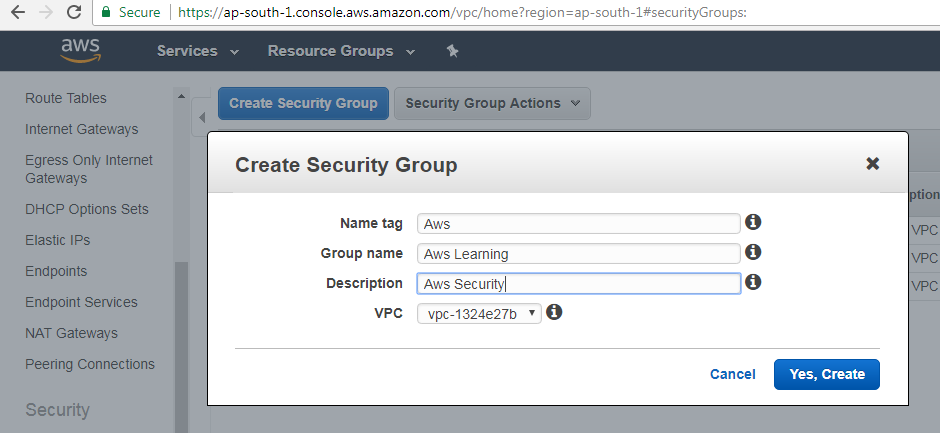
Step-2: Create Security Groups:
This process is similar to creating an SG (Security Group) in classic EC2.
A security group is a set of firewall rules that control the traffic for your instance. On this page, you can add rules to allow specific traffic to reach your instance. For example, if you want to set up a web server and allow Internet traffic to reach your instance, add rules that allow unrestricted access to the HTTP and HTTPS ports. You can create a new security group or select from an existing one below.
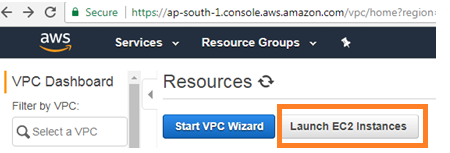
Step-3: Launch an Instance into Your PC
Click on Launch EC2 Instances.
1) Choose an Amazon Image (AMI)
2) Choose an Instance Type
Amazon EC2 provides a wide selection of instance types optimized to fit different use cases. Instances are virtual servers that can run applications.
They have varying combinations of CPU, memory, storage, and networking capacity, and give you the flexibility to choose the appropriate mix of resources for your applications.
3) Configure Instance:
Configure the instance to suit your requirements. You can launch multiple instances from the same AMI, request Spot instances to take advantage of the lower pricing, assign an access management role to the instance, and more.
4) Add Storage:
Your instance will be launched with the following storage device settings. You can attach additional EBS volumes and instance store volumes to your instance, or edit the settings of the root volume. You can also attach additional EBS volumes after launching an instance, but not instance store volumes.
5) Add Tags:
A tag consists of a case-sensitive key-value pair. For example, you could define a tag with key = Name and value = Webserver.
A copy of a tag can be applied to volumes, instances or both.
Tags will be applied to all instances and volumes.
6) Configure Security Group:
A security group is a set of firewall rules that control the traffic for your instance. On this page, you can add rules to allow specific traffic to reach your instance.
For example, if you want to set up a web server and allow Internet traffic to reach your instance, add rules that allow unrestricted access to the HTTP and HTTPS ports. You can create a new security group or select from an existing one below.
7) Review Instance Launch
Please review your instance launch details. You can go back to edit changes for each section. Click Launch to assign a key pair to your instance and complete the launch process.
Step-4: Assign an Elastic IP Address to Your Instance
In this step, you launched your instance into a public subnet a subnet that has a route to an Internet gateway.
However, the instance in your subnet also needs a public IPv4 address to be able to communicate with the Internet.
By default, the instance has no VPC and it is not assigned to a public IPv4 address.
In this step, you’ll allocate an Elastic IP address to your account, and then associate it with your instance.

Mahesh J
Author
Hello all! I’m a nature’s child, who loves the wild, bringing technical knowledge to you restyled.